Winter. Finally. {And a Recipe for Dried-Apple Slab Pie}

Winter has finally found its way to Georgia.  After weeks upon weeks of unseasonably warm weather, sub-freezing temperatures have arrived with a vengeance. 

I can’t say I’m sorry.  I enjoy the warmth, but I also relish a cup of coffee by the fire, clear cold days and nights curled up under layers of blankets.  The fourth season is often a short one in Georgia, but I’d miss it if it chose to bypass us altogether.

The warm temperatures we’ve experienced up until now have led to some confusion in the garden.  I went out yesterday to cut back the asparagus ferns, brown and dry except for a few red and green berries that are still hanging around.  As I cut the stalks off close to the ground, and pulled weeds from around the bed, I noticed a couple of tender, fresh spears poking up through the dirt.  One of them was nearly white from having been covered over by a patch of chickweed, while the other was bright green tipped in purple.  I carefully cleared the space around them and left them to bask in the bright January sun.  I’m not sure they’ll survive the hard freezes we’re having overnight, but hopefully this bodes well for our spring asparagus crop.

The true onset of winter is signaled by a dearth of fresh fruits at the market.  There are still some varieties of storage apples available locally, but for the most part we’re seeing fruit that’s been flown in from far-flung places. Luckily, I had the presence of mind to dry a bunch of apples back in October.  When we received an invitation to dinner from some friends the other day, I knew just what I wanted to take as my dessert offering.

I had seen a recipe from the King Arthur Flour Baking Banter Blog for an Apple Slab.  I was intrigued by this combination pie/bar/cookie concoction, so I pinned it on one of my Pinterest boards.   I used it for inspiration, but as usual I also made the recipe my own.  The original calls for fresh apples that you layer with bread crumbs and sugar and cinnamon between two pie crusts.  This appears to result in a firmer textured filling.  I was looking for something slightly more pie-like, but that could still be sliced into neat little squares.  Enter the dried apple.

  Dried-Apple Slab Pie with Caramel Glaze

prep time: 1 1/2 hours (allows for filling to cool and crust to rest)
bake time: 1 hour
serves: 12

Ingredients

  • 2 pie crusts (you can use store bought, or your favorite double-crust pie dough recipe)
  • 2 quarts dried apples
  • Apple cider to cover apples (approximately 1 quart)
  • 2 tablespoons sucanat (can use brown sugar)
  • 1 teaspoon cinnamon
  • 1 tablespoon corn starch mixed with 2 tablespoons water (to form a slurry)
  • 1 cup evaporated milk
  • 1 cup honey granules (can use granulated sugar)
  • 1/2 stick of butter
  • 1 teaspoon vanilla extract

  1. Place dried apples in a large saucepan and cover with cider
  2. Cover and bring to a boil, allowing apples to rehydrate.
  3. Remove apples from the pan and place in a heat-proof bowl, leaving the cider behind in the saucepan.  Add the sucanat and cinnamon to the cider and return to a boil.  Slowly pour the corn starch slurry into the boiling cider mixture, whisking to avoid lumps.
  4. Boil to reduce slightly and thicken.  Remove from heat and pour over apples.  Refrigerate to cool.
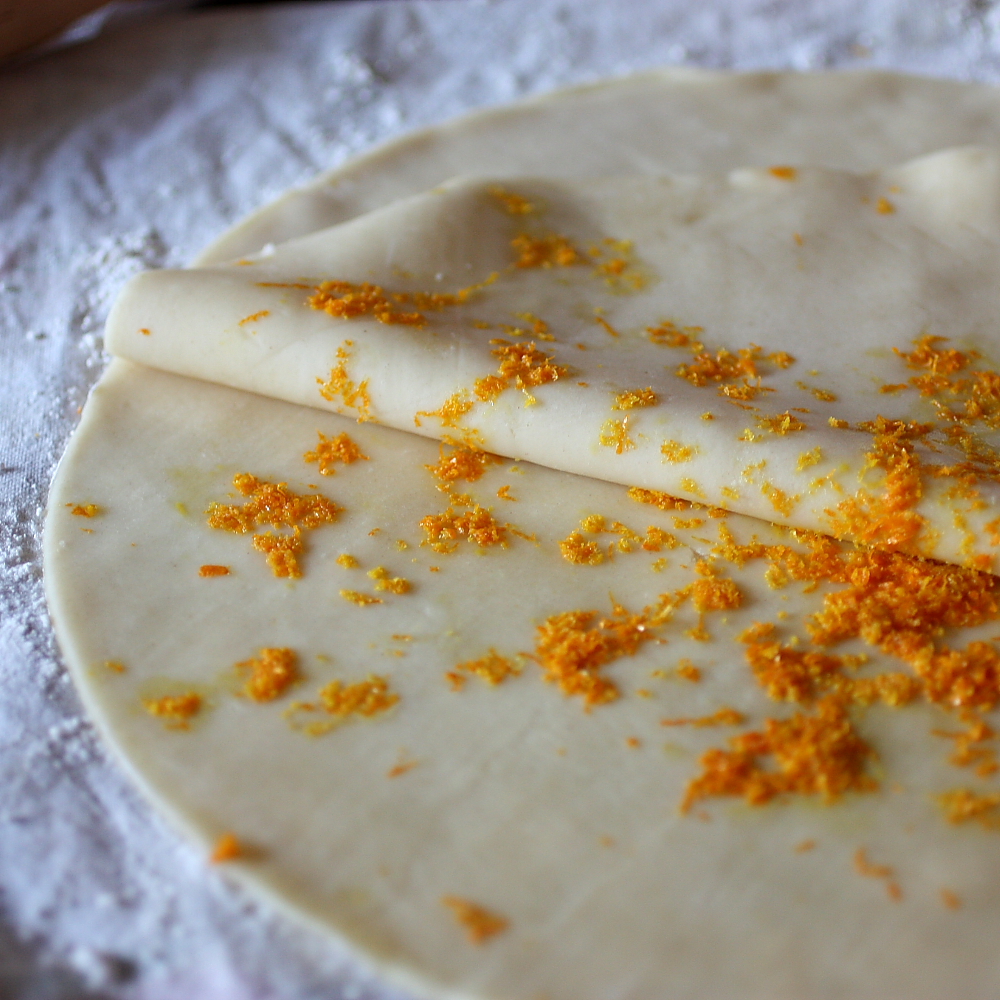
  5. While the filling cools, make your pie crust dough.
  6. Preheat your oven to 350F
  7. Roll 1/2 of the pie dough out to a 9×13 inch rectangle.  Place it in the bottom of a 9×13 inch baking pan.
  8. Pour the cooled apple filling into the pan.
  9. Roll the second 1/2 of the dough out to a 9×13-inch rectangle and place on top of the apple filling
  10. Bake for 1 hour.
  11. While pie is baking, make the caramel.
  12. Combine the evaporated milk and honey granules in a heavy-bottomed saucepan.  Bring to a boil.  Allow to boil until it reaches the firm ball stage.
  13. Remove from heat, add the butter and vanilla, whisking to combine.  Continue whisking until it begins to thicken and loose its sheen
  14. When pie has finished baking, remove it from the oven and pour the caramel over the top.  Use an offset spatula to spread it evenly.
  15. Allow to cool, then slice into 12 squares.

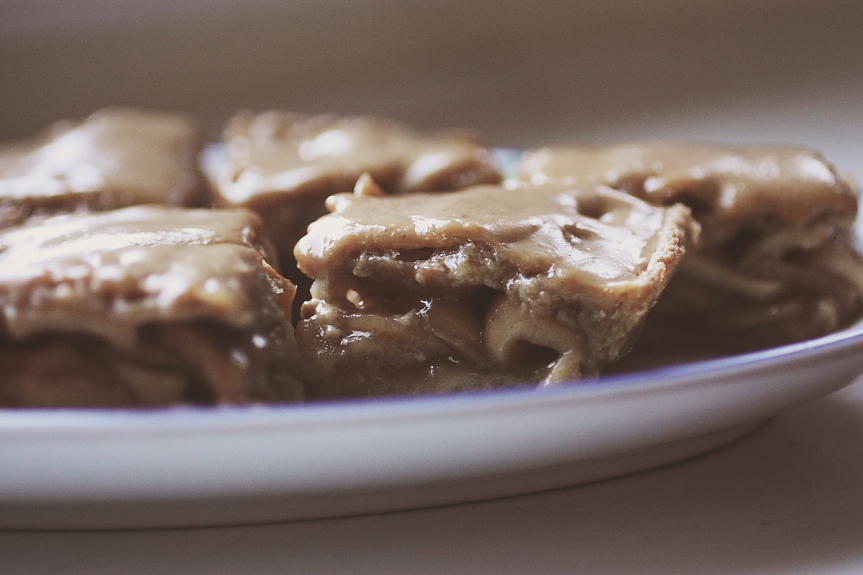
What results is a juicy, tart filling between two flaky layers of pastry, and a creamy rich caramel glaze on top.  The fact that there’s only two tablespoons of sugar in the filling means the true flavor of the apples really comes through.  I had dried a combination of Granny Smith, Pink Lady and Arkansas Black, so the apples were all quite tart.  They balanced quite well with the sweet, buttery caramel. We ate ours plain, but I imagine it would be especially delicious topped with a scoop of vanilla ice cream or a dollop of whipped cream.

Or maybe even for breakfast with a piping hot cup of coffee.  Curled up with a good book in front of the fire, that sounds like an excellent way to spend a cold winter morning.

Homemade Holiday Gift Ideas ( A Round-up of Sorts)

Can you believe that tomorrow is December 1? I’m kind of in denial about the whole thing – holding on to November for as long as I possibly can.

Maybe it’s because I’m starting a new job on Monday. Yes, right in the middle of the holiday fray, I’m starting a new job and putting my youngest back into day care. What stress? What added pressure?

It’s definitely for the best, and I’m really excited about the opportunity. It just comes (as most things do) at a particularly busy time.

With that in mind, it might be a while before I post anything on the blog. It’s not that I won’t be baking and cooking, it’s just that I’m not sure how much writing and editing time I’ll have. I’m prepared, though. I’m arming you with some of my favorite holiday posts from last year to get you started. These were all big hits with my friends and family, and I hope you’ll enjoy making and giving them as much as I did.

Homemade Panettone (excellent for French Toast)
Time consuming, but totally worth it!

Cranberry and White Chocolate Oatmeal Cookies
A versatile cookie recipe that adapts to all manner of flavors and add-ins.

Pink Peppercorn Sea Salt Caramels
As delicious as they are beautiful!

Whole Wheat Sugar Cookies with Royal Icing
If you’ve ever been intimidated by royal icing, this should help you overcome your fears!

So, thanks to all of you for continuing to come to this little corner of the internet.  I’m grateful for your support and feedback, and for your patience when things get a little sporadic.  Life continues to happen for all of us outside of cyberspace, and I’m thankful that I still have a creative outlet and a place to share the things I love.

Let me know if you try any of these recipes, and if you give them as gifts or keep them all to yourselves (I know I’m tempted to do that with those caramels, and with that panettone).  Hopefully I’ll find that I have time to continue to post regularly, but if not, maybe you’ll find some inspiration from these in the meantime.

Enjoy!

The tart that replaced pecan pie in my Thanksgiving repertoire

As a child, I hated pecan pie.  I think it was because (as I’ve come to understand in my adult years) the filling was often overcooked to the point of being curdled.

There is a delicate balance in pecan pie, a fine line that bakers walk between silky smooth custard filling and curdled eggy mess.  I’ve encountered very few pecan pies in my life that have been perfectly silky smooth, and have only been able to personally achieve it once.

It really relies on the baker taking the pie out of the oven when the center is still almost liquid, and most home cooks (myself sometimes included) are wary of serving undercooked custard to their friends and family.

Luckily, I discovered a tart about six years ago that incorporates nuts without using an egg-based filling to hold them all together.  It was featured in the October 2004 issue of Bon Appetit magazine, and I think it was the photo that really drew me in.  Those lovely green pistachios, suspended in creamy caramel, nestled tightly between chunks of walnut and slivers of almond, just spoke to me.  The combination of honey and rosewater in the caramel, and the orange zest in the crust, makes for a flavor profile reminiscent of baklava, but so much more complex.

Over the years, I’ve adapted the recipe to suit my tastes (I replaced the walnuts with cashews, and sometimes I use store-bought pie crusts that I roll orange zest into to mimic the original. You could also use your favorite short-crust recipe here), and it has become a staple of our Thanksgiving dessert table.  Since we’ve incorporated this tart into our menu, the pecan pie has sadly gone by the wayside.

This year, I almost forewent making it, simply because shelled pistachios were $1 an ounce at the grocery store.  It almost seemed ludicrous to spend that much money on a single ingredient.  I decided instead to buy unshelled pistachios and shell them myself.  It added 15 or 20 minutes to my prep time, and my fingertips are sore, but it was totally worth it.

Caramelized Pistachio, Cashew and Almond Tart
Prep time 15 minutes
Cook time 35 minutes
Serves 8-10

Ingredients
2 store-bought pie crusts
2 teaspoons orange zest
1 cup heavy cream
1/2 cup sugar
1/4 cup brown sugar
1/4 cup honey
3/4 cup toasted pistachios (I use salted)
3/4 cup toasted cashews (I use salted)
3/4 cup toasted slivered almonds (unsalted)
1 1/2 teaspoons rose water

Begin by laying one of the pie-crust rounds on a floured surface.  Sprinkle the orange zest on top, and lay the second pie-crust round on top of the first.  Using a rolling pin, roll the crusts together until you can see the orange zest between showing through.  Place the rolled out crust into a 10-inch tart pan, fitting it against the bottom and sides.  Trim the excess dough, and place the tart shell in the freezer for 20 minutes.

Preheat your oven to 350F.

Place cream, sugar, brown sugar and honey in a heavy-bottomed saucepan.  Bring to a boil, stirring until sugar dissolves.  Continue to boil until mixture darkens and thickens slightly (Bon Appetit originally said for 4 minutes, but it usually takes me closer to 8 or 10 minutes).  Removed from the heat, add the nuts and the rose water.  Pour filling evenly into crust.

Bake tart until filling is caramel brown and bubbling all over.  Transfer to a rack to cool.

Enjoy!

Holiday gift ideas: Pink Peppercorn Sea Salt Caramels

Every year, I try to come up with interesting and flavorful homemade holiday gifts to give my friends, colleagues and family.  I usually bake a variety of cookies, cakes, shortbread and crackers, package them up and give them away in decorative tins and boxes.

This year, I wanted to try something new.   Don’t get me wrong, I’m still baking (as is evidenced by the 80 or so cookies cooling on my kitchen counter right now), but I thought it might be fun to try my hand at something different and unique. I looked through cookbooks, websites and magazines, and the one recipe I kept coming back to was for Salt and Pink Peppercorn Caramels from Better Homes and Gardens‘ December issue.  The photo in the magazine was so beautiful, and the description that accompanied the photo was equally as lovely.  I just knew I had to try this flavor combination.

I decided, though, that I would make my own caramel recipe, and just add the pink peppercorns and salt at the end.  The BHG recipe was fine, but it used brown sugar, and I prefer my caramel made with white sugar.  I know that this is one of those super-refined ingredients, and I would love to experiment with candy-making using unrefined cane sugar, but at this point I’m comfortable with the familiar.  And I just don’t make candy all that often, so when I do, familiar is important.  Candy-making is a fickle art, and I’m not yet knowledgeable enough to be totally experimental, especially since I need these to give as a secret-Santa gift tomorrow.

According to Serious Eats:

Pink peppercorns lend foods a different kind of heat, closer to chiles than black pepper. They have the same peppery bite, but it’s wrapped in a sweet fruity flavor reminiscent of a berry with an attitude. The peppercorns have a thin, fragile skin that can easily be rubbed off (a great lightly-flavored colorful garnish for fish or chicken).

Based on this description, it only makes sense that you’d pair them with something sweet, and when you enhance the whole thing with some French Celtic sea salt, you’ve got a perfectly balanced bite.

Pink Peppercorn Sea Salt Caramels
prep time: 5 minutes
cook time: 40 minutes
rest time: 2 hours
yields: 60 pieces
Ingredients
2 1/2 cups sugar
1 1/2 cups light corn syrup
1 cup salted butter, cut into pieces
2 cups heavy cream, divided
1 teaspoon crushed pink peppercorns
1 teaspoon French Celtic sea salt
  1. Prepare a rectangular baking pan by lining it with aluminum foil and spraying with oil or greasing with butter.  Set aside.
  2. Combine sugar, corn syrup, butter and 1 cup cream in a large, heavy-bottomed sauce pan over medium heat.
  3. Stir until sugar is dissolved, about 5 minutes, then wash down sides of the pan with a pastry brush dipped in warm water.
  4. Place a warmed candy thermometer in the pan and cook the mixture over medium heat, stirring constantly, until it comes to a boil. 
  5. Wash down any crystals that form on the sides.
  6. Continue to cook until the mixture reaches 244F, or Firm Ball stage.
  7. Remove the pan from the heat and with a clean wooden spoon, gradually stir in the 2nd cup of cream.
  8. Return to the heat, bring back to Firm Ball stage, or at least 245F.
  9. Remove from the heat and pour into your prepared baking pan.
  10. Allow to cool for 10 minutes. 
  11. Sprinkle crushed peppercorns and salt evenly over the surface.
  12. Allow to cool completely – you may want to put it in the fridge to speed this process.
  13. Once cool, remove the caramel from the pan by lifting the foil liner.  
  14. Peel off the foil, and cut into pieces.
  15. Wrap with waxed paper.

Aren’t they pretty?  And I can tell you, the flavor is just as nice.  These are a great little holiday treat for your friends and family.  The pink peppercorns add a unique dimension to the flavor profile, while also adding a touch of holiday color to an otherwise ordinary salted caramel.  Try them and let me know what you think.

Enjoy!