Hen House Drama, a Timely Pardon, and Cornmeal Pancakes

Before I get started, I want to give a warm welcome and sincere thank you to any of you who found life, in recipes through Freshly Pressed.  I was completely surprised (pleasantly so) when I saw that one of my posts had been featured the other day.  I am beyond grateful for all of your thoughtful comments and words of encouragement.  If you like what you’ve seen so far, I invite you to keep up with the blog through Facebook, Twitter, or RSS feed.  You can also follow me on Pinterest

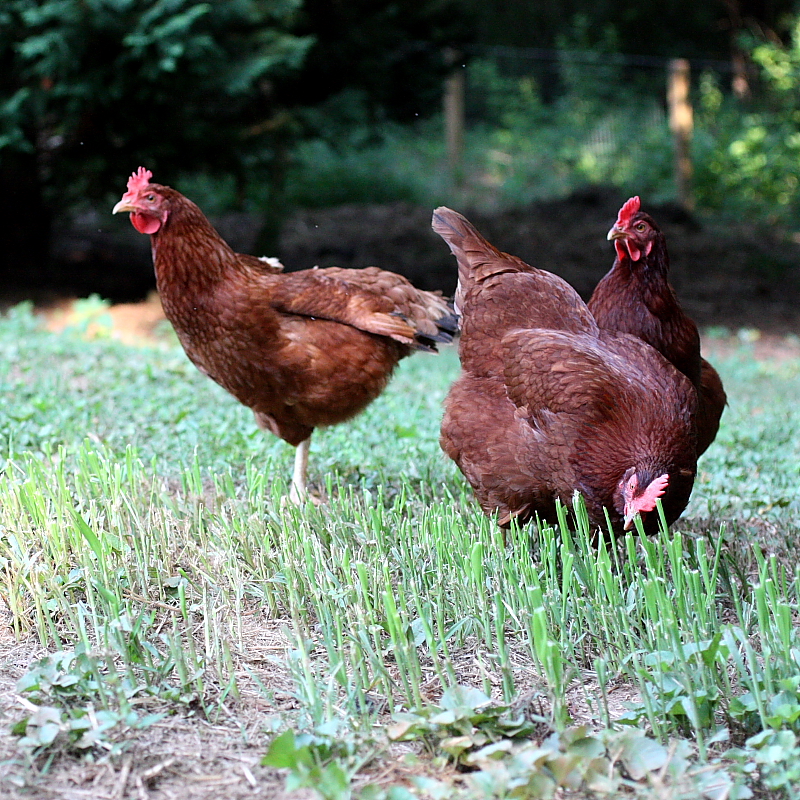
In the spirit of full disclosure, our adventures in backyard poultry rearing have not been without, um, shall we say,  challenges.  We started back in April with three Rhode Island Reds – Fred, Tweety and Sally.  Things seemed great at first – we were getting three eggs a day, the chickens seemed happy (we let them free range during the day, and put them back in the coop at night), and it wasn’t a tremendous amount of work.  We made sure they had food, water, and fresh air, and they provided us with a dozen eggs every four days. It seemed almost too good to be true.
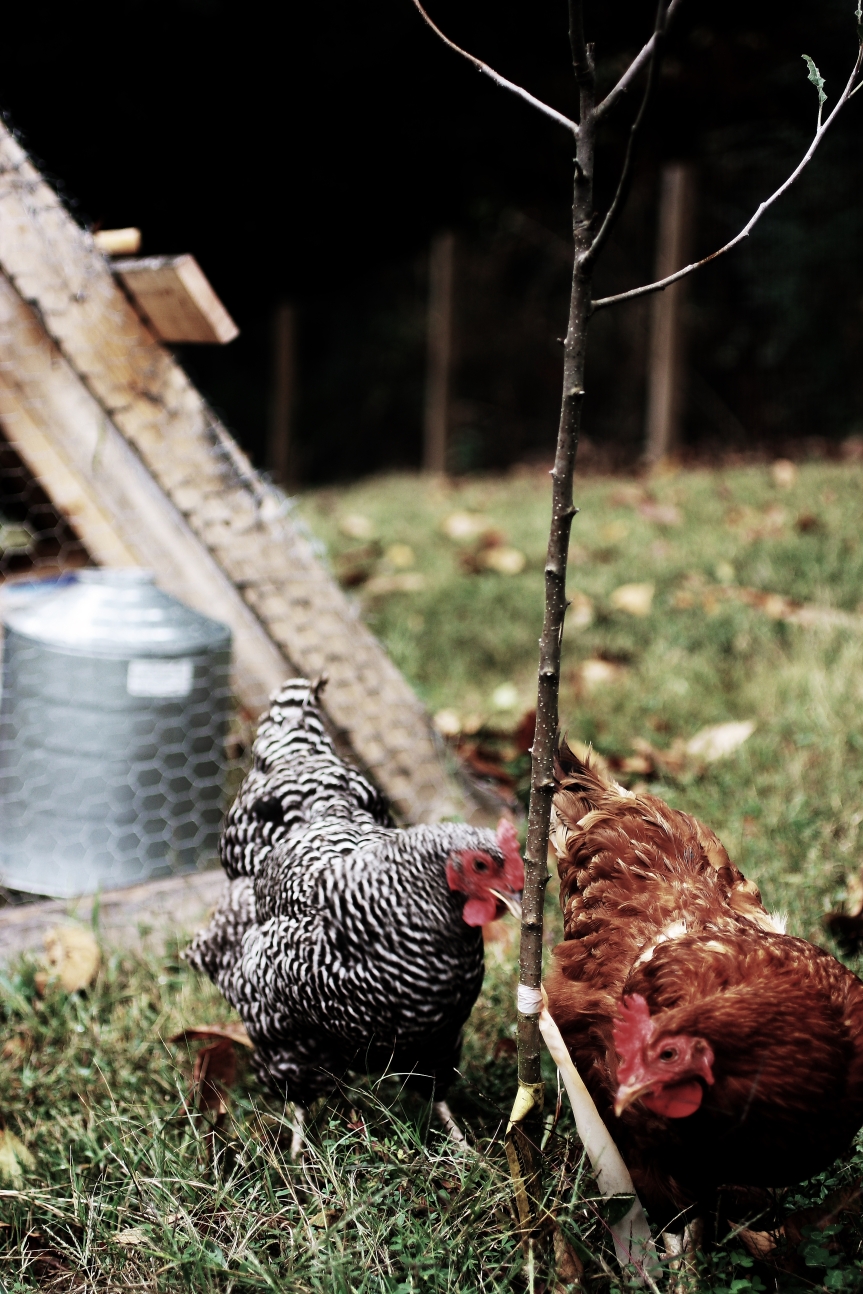
And that’s because it was.  We lost Fred in August to what we believe was a black widow spider bite, and we lost Tweety in October to a predator of some sort or another.  We didn’t want Sally to be lonely, so we found her four new friends – Spot and Dot, two lovely black and white Barred Rock hens, and Fred, Jr. and Tweety, Jr., a couple of Ameraucanas.  We promised to keep them safe, well fed and watered, in exchange for eggs.  We were looking forward to four or five eggs a day, perhaps enough to share with our friends and neighbors.  This was in November.

At first, Sally wasn’t terribly keen on her new coop-mates.  In particular, she decided that Tweety, Jr. was her nemesis.  Every time that poor hen would get close to Sally, she would peck at her and pull her tail feathers out.  Tweety, Jr. became scared to leave the corner by the nesting boxes – she would huddle there, trembling, trying to make herself as small as possible.  Sally was like the schoolyard bully, exerting her dominance over the new kid on the block.  I’m not sure what it was about poor Tweety, Jr. (maybe it was her name), but after a while Sally left her completely devoid of tail feathers.

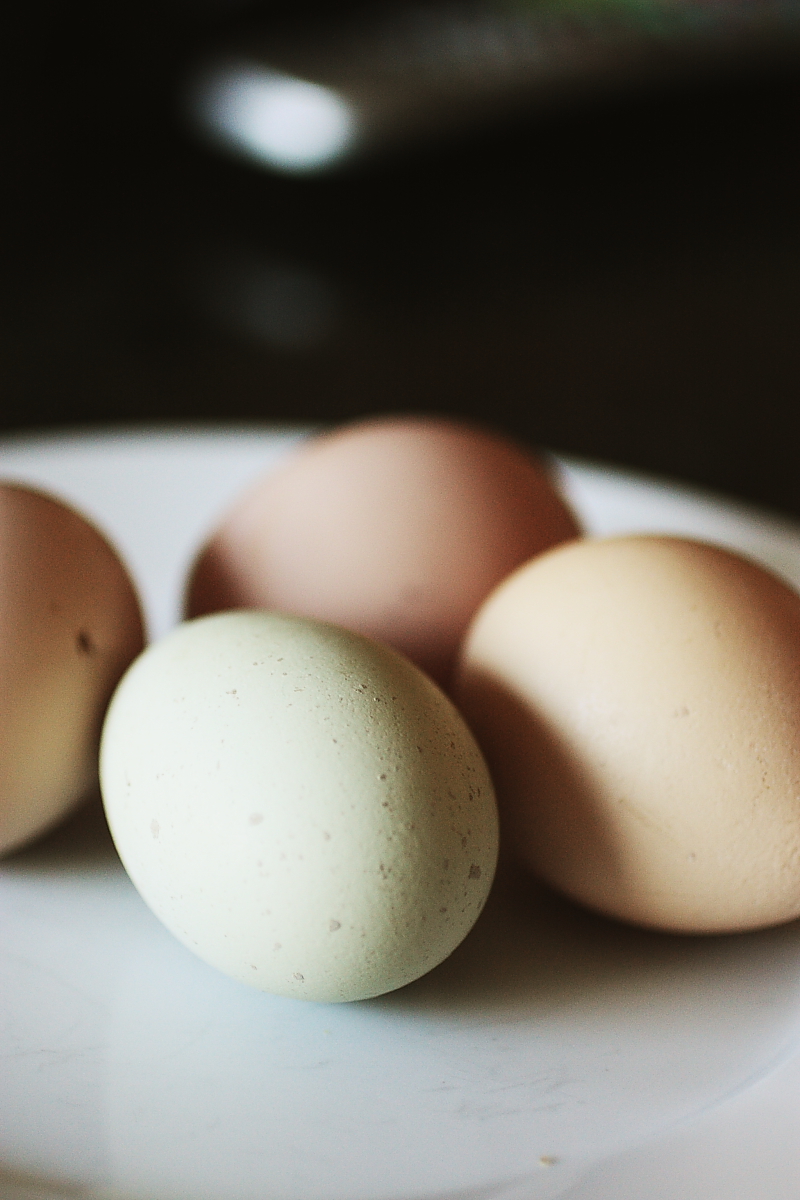
In addition to this little pecking-order drama, the egg production was not what we’d hoped it would be.  For a while, it was only Sally laying.  Then occasionally one of the Rocks would lay – either Spot or Dot.  We know it wasn’t an Ameraucana because all of the eggs were of the brownish variety – Ameraucana eggs are greenish blue (part of the reason we chose the breed).  From late October to late January, there was nary a green egg to be had.  We’d been told that the hens were 8 months old when we got them, so they should have been of prime laying age.  Had we been swindled?  Were these gals completely infertile?  Was the trauma being inflicted upon them by that bully Sally too much to handle?  We weren’t sure.  What we did know was that they were eating an awful lot of feed and not producing anything in return.

Over time, the drama subsided, and Tweety Jr.’s tail feathers began to fill in again.  Both Rocks began laying regularly, and things seemed to be on a more even keel in the hen house.  When the weather began to get cold (for those two days back in January) we decided we need to put a heat lamp in the coop to keep the water from freezing overnight.  The light seemed to make things even better – the egg production from Sally, Spot and Dot increased.  Tweety, Jr. and Fred, Jr., though?  Not so much.

My mother and my husband have “joked” on more than one occasion about sending the Ameraucana’s to the stew pot.  I chose to ignore them.

The other day I went out to the coop, as I do in the afternoon, and I lifted the door to the nesting boxes.  There, nestled in the straw, were four eggs.  Three brown and one green (!).

And there was much rejoicing.

The (theoretical) trip to the stew pot has been stayed.
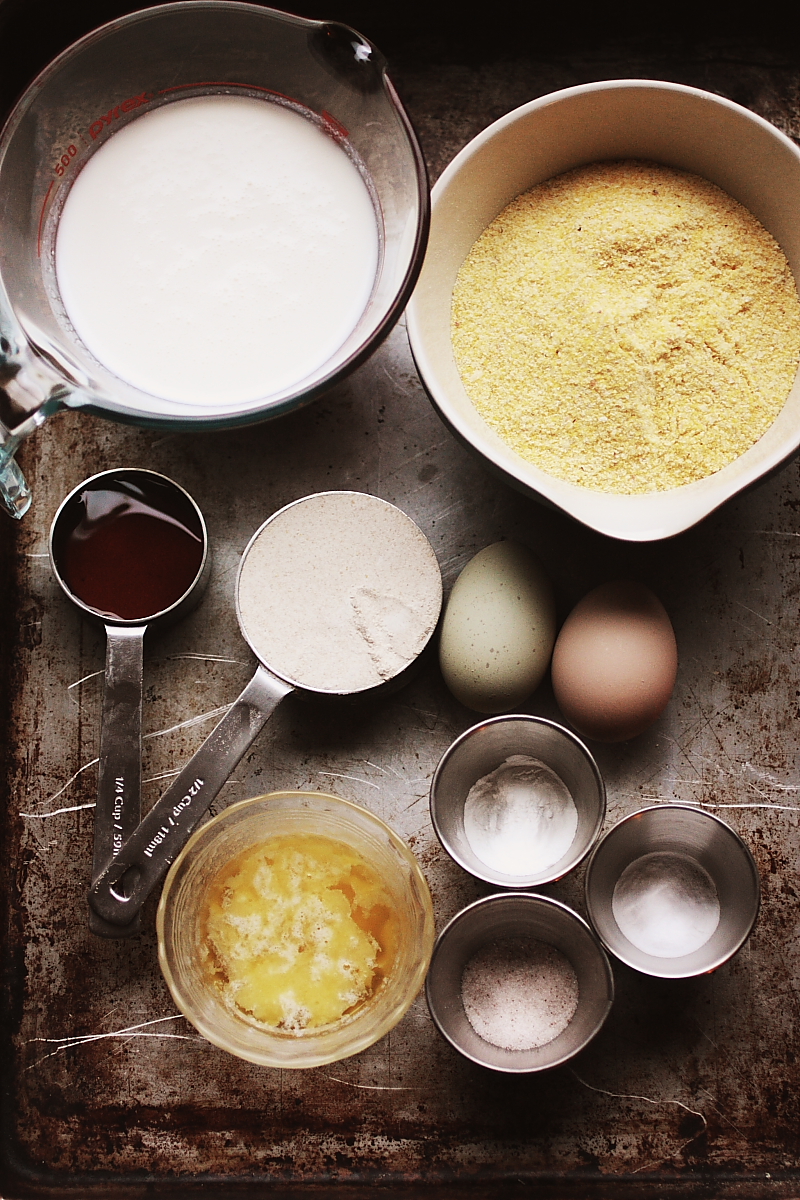
This morning I used that beautiful green egg in some cornmeal pancakes I’ve been wanting to tell you about.  I made them for the first time a couple of weeks ago, and I’ve been thinking about them ever since.  I make whole-grain pancakes all the time – usually a mixture of rolled oats and freshly ground wheat – but this is the first time I’ve really delved into the cornmeal variety.  I think it’s because I’ve been getting all of this lovely freshly ground meal from Rockin’ S Farms – I really want to showcase it.  The sweetness of the corn lends itself really nicely to a pancake application.  Together with some local raw honey, cultured buttermilk, and those coveted eggs from our backyard flock, they make for a delightful breakfast. 
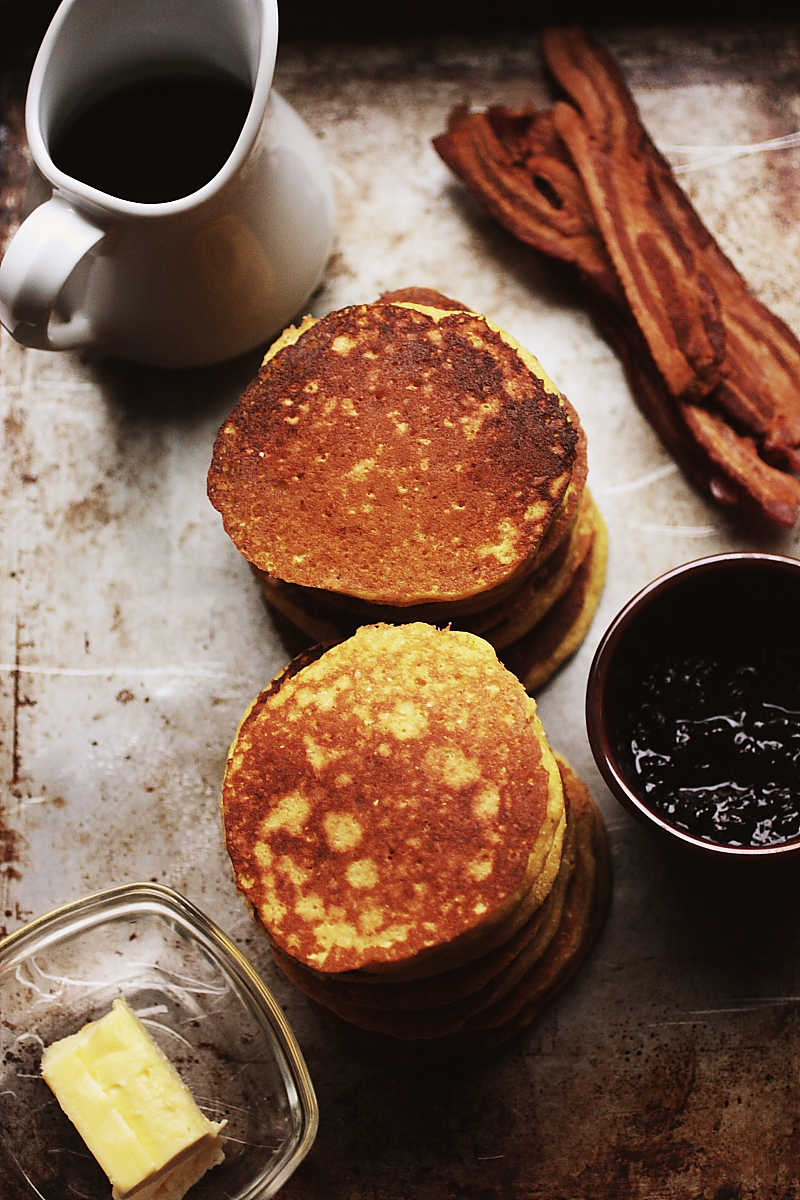
Honey, Buttermilk and Cornmeal Pancakes
prep time: 5 minutes
cook time: 20 minutes
yields: 16 4-inch pancakes

Ingredients

  • 1 1/2 cups cornmeal
  • 1/2 cup whole-wheat flour
  • 1 1/2 teaspoons baking powder
  • 1/4 teaspoon baking soda
  • 3/4 teaspoon salt
  • 1 2/3 cups buttermilk
  • 1/4 cup honey (I’ve also used molasses here, for a deeper flavor)
  • 2 eggs
  • 3 Tablespoons melted butter
  1. In a large bowl, whisk together the dry ingredients
  2. In a separate bowl, whisk together the buttermilk, honey, eggs and melted butter
  3. Add the wet ingredients to the dry ingredients and stir to combine.  Do not overmix.
  4. Ladle by quarter-cupfuls onto a hot griddle.  Allow to brown on the first side before flipping to the second side.
  5. Serve warm with warm maple syrup, honey or fruit compote (I used some warm blueberry jam).
  6. Enjoy!

A Marriage Cake

Eight years ago, I married my best friend.

What I remember most about that day, the thing that sticks most resiliently in my mind, is how adamantly I wanted to be married.  I was done with the pomp and circumstance of the wedding before the wedding had even begun.  And it wasn’t like we had a big wedding – it was very intimate, a day shared with our closest friends and family.  A rainy, October day on a beach in St. Augustine with a very casual reception afterward.  But as I stood in the bridal suite, having my corset laced and my picture taken, all I could think about was getting on with the marriage part of the deal.  The wedding was nice, but I wasn’t nearly as excited about that as I was about spending the rest of my life married to my best friend.  Maybe I’m weird.

And marriage hasn’t disappointed.  I mean, sure we’ve had our ups and downs.  It’s not perfect, but I never expected it to be.  I knew it would be work – in a Tim Gunn, “make it work” kind of way.  There are good days and there are bad days, but they are our days.  Our days to take on together, as a team.  The successes and the failures, the happy and the sad – we meet them all head on, a united front.

This year, our anniversary fell on a rainy, gray Tuesday.  He had to work, and I was home with our youngest all day.  We’d been out to a restaurant the Saturday prior – a kind of pre-Anniversary celebration since we had overnight child-care in the form of my husband’s parents (yay for in-town grandparents!).  But I wanted to do something, however small, to celebrate the actual day.

I had commented as we drove back from dinner on Saturday, discussing where we should stop in for dessert, that I wished we could find an 8-year-old wedding cake top tier.  Not that I think there should be a bakery that specializes in moldy old cake – that’s just gross.  But there is something nostalgic and fun in sitting down together to share that top tier of your wedding cake on your first anniversary.  In subsequent years, you just don’t have anything quite that special.

As I stood in the kitchen yesterday, laughing quietly to myself at the thought of a bakery with lighted glass display shelves lined with stale, moldy cake (the mind does tend to wonder), it came to me.  I’d bake a marriage cake.  A small, intimate 6-inch cake.  Nothing elaborate, just a simple everyday cake to celebrate our every day, all day, lifelong marriage.

To get the ratios for a single, six-inch layer, I turned to Dessert for Two, a blog dedicated to reducing dessert recipes to a quantity fit for two people to consume in one sitting.  I went with the cake recipe for her Better Than Sex Cake, subbing whole-wheat flour and honey granules for their more refined counterparts.  I didn’t have any pineapple, and my husband doesn’t care for shredded coconut, so I improvised on the topping.

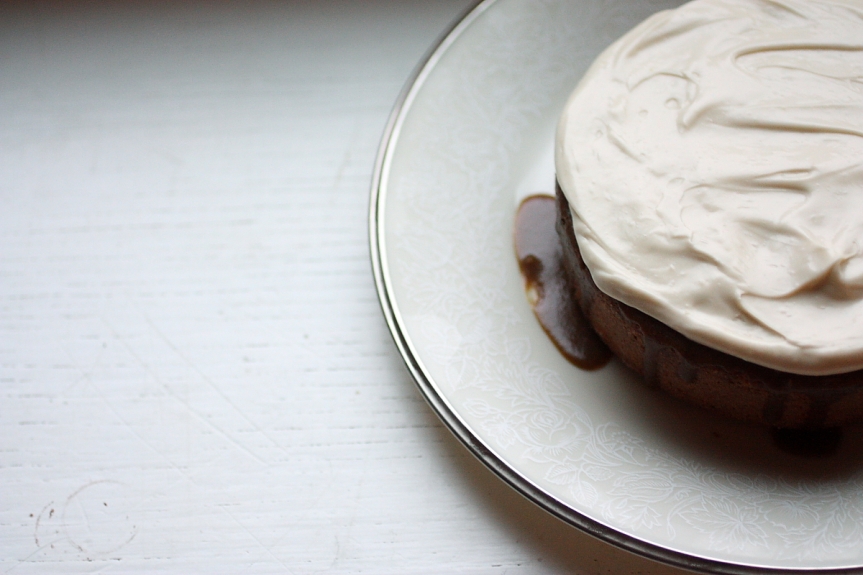
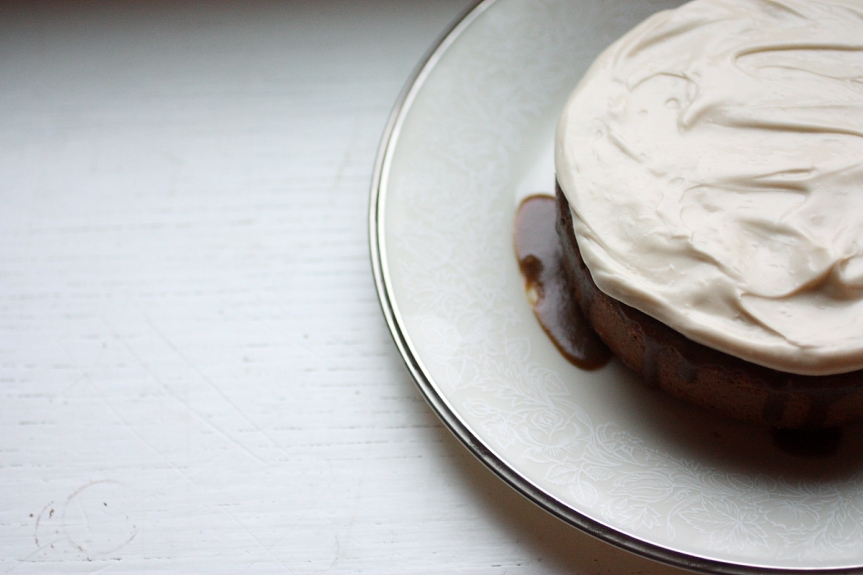
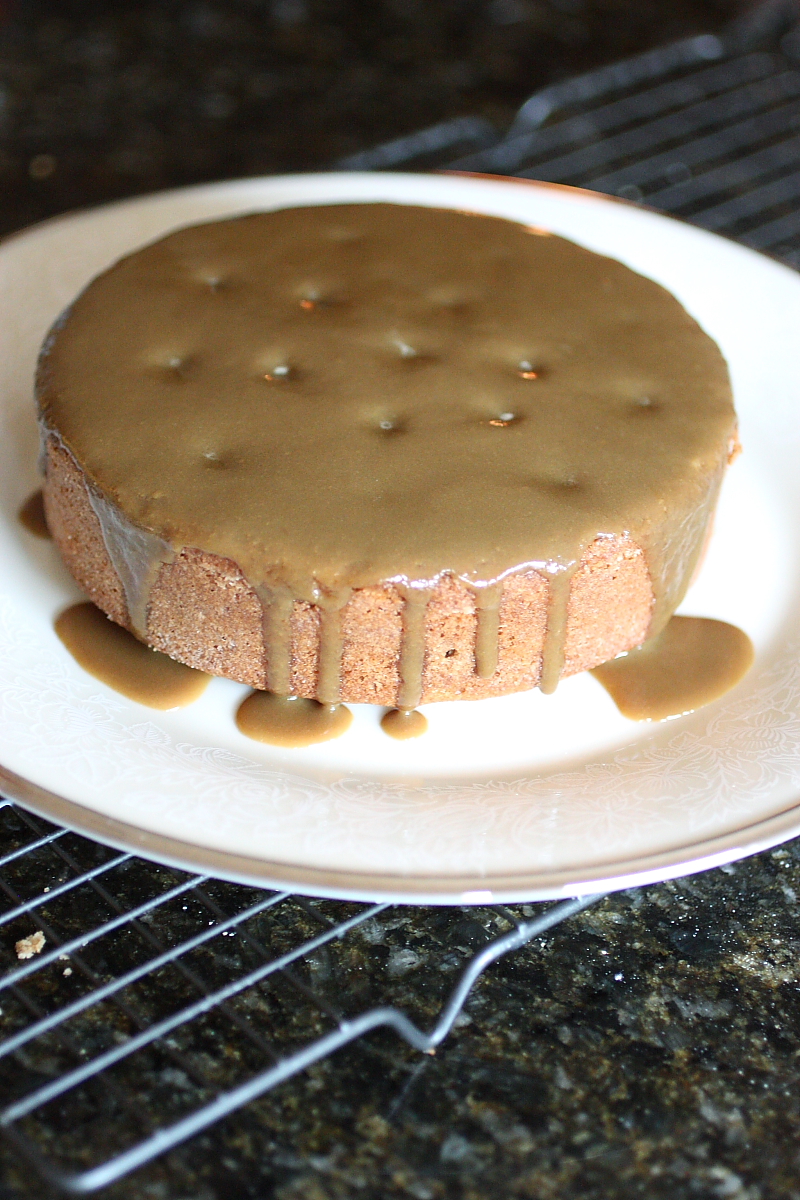
I glazed the tiny cake with a mixture of buttermilk (1/2 cup), sucanat (1/4 cup) and rum (teaspoon) that I cooked together until the sucanat dissolved.  I then stirred in a tablespoon of cold butter to thicken and enrich the glaze.   Once the cake had cooled, I poked holes in the top and drizzled the glaze over top.

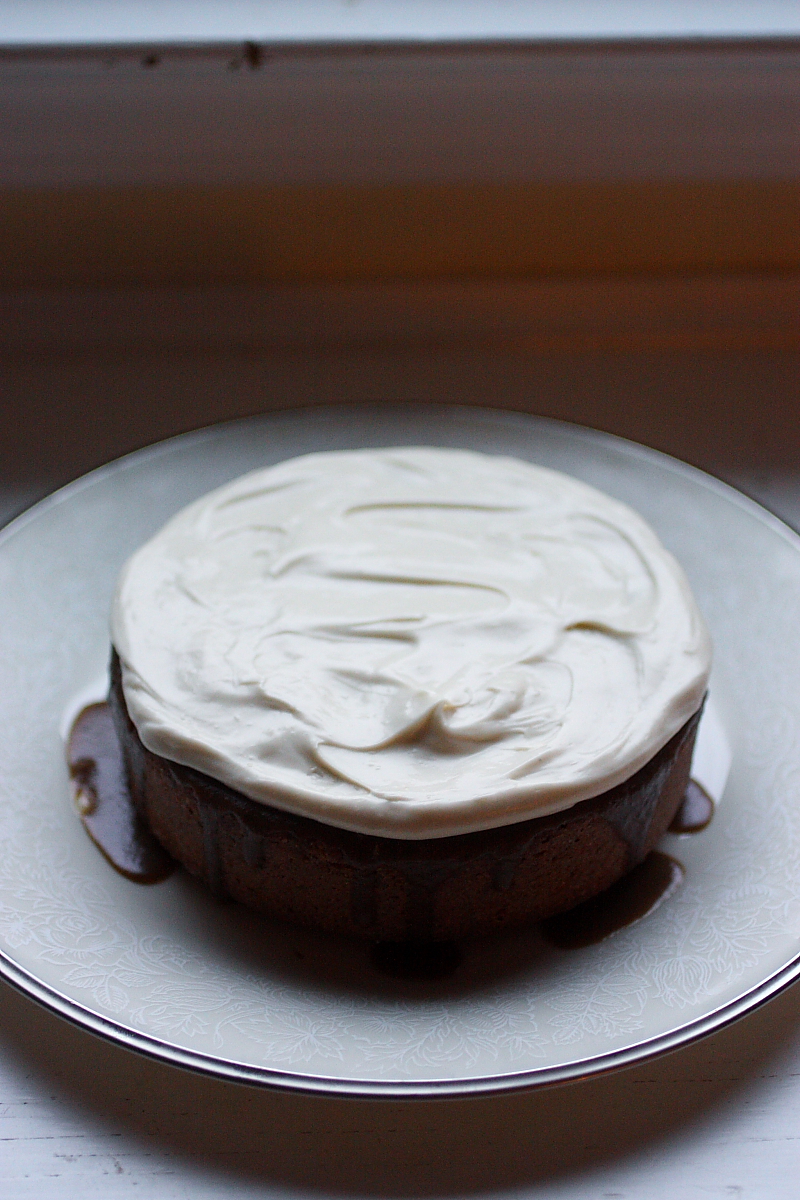
I frosted it with a cream-cheese based frosting: 4 oz. cream cheese, 2 tablespoons softened butter, 2 tablespoons honey granules, 1 tablespoon agave nectar, 1 teaspoon rum.

In a lot of ways, this was the perfect cake to eat on an 8th wedding anniversary.  It’s not terribly refined, it’s a little rough around the edges, and it’s got a little bit of a sour edge to it from the buttermilk and the cream cheese.  There is a bit of sweetness, though, and the sweetness has some depth to it, from the darker sucanat in the glaze and the honey granules in the frosting.  And there’s just a hint of something fun and flirty peeking through from the addition of the rum.

Despite its unrefined appearance, I served it up on some of our fine china.  And we shared it, just as we did that top tier seven years ago.

I think I’ll make this a tradition – baking a single tier for us to share on our anniversary.  I’m sure the cake will change, just as our marriage will change (for the better, I hope), but I love the idea of taking the time to share something sweet together and to reflect on the reasons we fell in love in the first place.

Marriage Cake
adapted from Dessert for Two’s Better than Sex Cake

  • 1/4 cup solid coconut oil
  • 2 tablespoons unsalted butter, softened
  • 1/2 cup honey granules
  • 1 large egg
  • 1/8 teaspoon rum
  • 3/4 cup whole wheat flour
  • 1/8 teaspoon salt
  • 1/4 teaspoon baking powder
  • 1/4 cup buttermilk

Glaze

  • 1/2 cup buttermilk
  • 1/4 cup sucanat
  • 1 teaspoon rum
  • 1 tablespoon butter, cold

Frosting

  • 4 oz. cream cheese
  • 1 oz. butter
  • 2 tablespoons honey granules
  • 1 tablespoon agave nectar
  • 1 teaspoon rum
  1. Preheat your oven to 350F and grease and flour a six-inch round cake pan
  2. In a medium-sized bowl, using a handheld mixer, cream together the coconut oil, butter and honey granules until light and fluffy.
  3. Add the rum and mix to combine.
  4. Add the egg and beat to incorporate
  5. Whisk together the flour, baking soda and salt
  6. Add the flour mixture in three parts, alternating with the buttermilk in two parts, until just incorporated
  7. Scrape batter into the prepared pan and bake for 30 minutes, or until a toothpick inserted in the middle comes out clean
  8. For the glaze, combine the buttermilk, sucanat and rum and cook over low heat until sucanat dissolves
  9. Off the heat, add the cold butter and whisk to incorporate – it should make the glaze a little thicker and shiny
  10. Once cake is done, allow to cool in pan on a rack for 15 minutes, then turn it out and allow it to cool all the way before glazing
  11. Once cooled, poke holes in the cake and pour the glaze over top.  Refrigerate for 15 minutes
  12. For the frosting, combine the cream cheese, softened butter and honey granules.  Beat on high until light and fluffy and honey granules are dissolved.  Add the agave and the rum.
  13. Frost the cake.
  14. Enjoy!

Peaches and Cream

It’s farmer’s market season, and that means my Saturday mornings are spent perusing the vendor booths in the parking lot of our town’s city hall.  Choosing the prettiest heads of cabbage, and the plumpest pickling cucumbers, the brightest bouquet of zinnias, and the peaches with the prettiest blush on their fuzzy cheeks.

This morning, I found myself with two very ripe peaches staring up at me from the kitchen counter. Their skins were just beginning to get a little loose, and I could smell their sweet ripe scent without lifting them to my nose. They really needed to be eaten or used in some form or fashion. We’d ploughed through the other seven in the bunch, and these were the last two stragglers. They’d been slightly under-ripe when I’d brought them home on Saturday, but now they were threatening decomp on my counter.
When I glanced at my Facebook wall, I noticed that Foodimentary had posted that it was National Peaches and Cream day.

Well, then.  I guess that was my answer.  Peaches and cream.

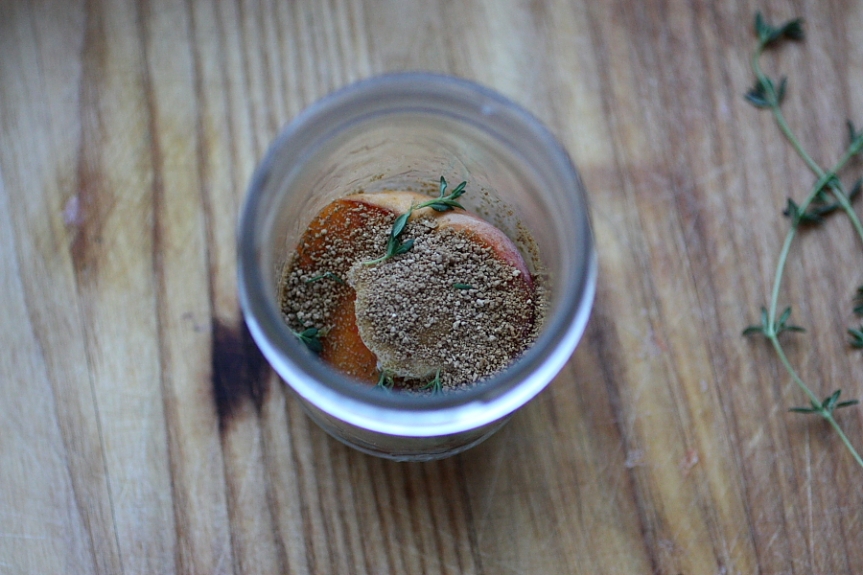
So, I halved my peaches and removed the pits.  I dropped one half of each into 2 half-pint mason jars, and topped those with 1 teaspoon of salted butter, 3/4 teaspoon of sucanat (you could use brown sugar if you don’t have sucanat) and the leaves from a sprig of thyme per jar.  I topped that with the other half of the peach.

I made a sweet biscuit dough, comprised of 1/4 cup of flour, 1 tablespoon of sucanat, 1/4 teaspoon baking soda and 1 Tablespoon of butter.  I brought it all together with about 1/4 cup of buttermilk and divided the batter evenly between the two jars.  I baked them in a 350F oven for about 15 minutes, or until the topping was golden brown, and I could see the peaches had softened and the liquid was bubbly.

I allowed them to cool a bit, then poked  holes in the crust with the fat end of a chopstick.  I carefully poured a couple of tablespoons of cold heavy cream into the jar and allowed it to soak into the crust and down into the peach syrup.  Then I ate it.  And I knew I had done the right thing.

Individual Peaches and Cream Cobblers
prep time: 5 minutes
bake time: 15 minutes
serves: 2

  • 2 peaches, halved and pitted
  • 1 Tablespoon plus 1 1/2 teaspoons sucanat, divided
  • 1 Tablespoon cold butter, cut into small pieces
  • 2 teaspoons softened butter
  • 2 sprigs of thyme
  • 1/4 cup white whole-wheat flour
  • 1/4 teaspoon baking soda
  • 1/4 cup buttermilk
  • 4 Tablespoons cold heavy cream
  1. Preheat your oven to 350F.  Have two half-pint mason jars ready
  2. Prepare the batter.  Combine the flour, 1 tablespoon of the sucanat, and the baking soda.  Cut the cold butter pieces into the flour mixture until it resembles coarse meal.  Add the buttermilk and stir to combine – do not overmix.  Set aside.
  3. Place 1/2 of each peach into  the mason jars. Top each half with 1 teaspoon softened butter, 3/4 teaspoon of sucanat the leaves from the thyme sprigs.
  4. Place the other half of each peach on top and spoon half the batter into each jar.
  5. Place the jars on a pan and bake in the preheated oven for 15 minutes, or until brown and bubbly.
  6. Remove from oven and allow to cool a bit.
  7. Just before eating, poke holes in the crust of each cobbler and pour 2 tablespoons of heavy cream into each, letting it soak into the topping and down into the fruit and syrup.
  8. Eat and enjoy!

Holiday traditions: Panettone

For quite a few years, our family has had a tradition of making french toast on Christmas morning.  For the longest time we made it with Challa because of it’s rich eggy flavor and wonderful texture – perfect for soaking up all that custardy goodness.

One year, though, we discovered the wonders of french toast made with panettone, and we’ve never looked back (at least on Christmas morning).

For about five years, I worked for Williams-Sonoma, and believe you me, I took advantage of the discounts that their associates receive every chance I got.  Oh, how I miss that discount.

Anyway, every year at Christmas, they would sell these huge tins of panettone chock-full of dried fruit and these lovely candied chestnuts.  And every year I would hope and pray that there would be one left after they went on sale toward the end of the season (you see, they cost somewhere in the neighborhood of $25 each, which was more than I was willing to pay for a loaf of bread – I don’t care how good it was).  Luckily, most years I was able to score one, and I would proudly bring it home and make the best french toast you ever did taste.

It’s been quite a few years since I’ve worked at the old W-S, and I’ve managed to make do each year since with other brands of panettone, but the tradition has definitely continued.

A couple of years ago, my mother tried her hand at making panettone at home, and she was sorely disappointed with the results.  It turned out dry and cakey, without the lovely light, moist crumb that you expect from good panettone.  I’m not sure what recipe she used, so I can’t steer you clear of it, unfortunately.

This year, I decided to throw my own hat in the ring and make a go of it.  I searched the internet for recipes, wanting to find a really good authentic version.  Unfortunately, I found that most folks who claimed exceptional results were hesitant to share their secrets.  There was one constant thread, though, that ran through most of the success stories, and that was using a sponge starter, biga or sourdough starter.  Evidently, the most traditional versions are made this way in Italy, and the best results are achieved by doing so.

In my search, I came across this website, which gave a cute little history of the bread, detailing the story of a protective father, a smitten suitor and a resulting famous loaf of bread that has lived on in infamy for centuries.  Additionally, it gave a recipe.  It seemed straightforward enough and it used a sponge starter, which appears to be the key to all good panettone.

A couple of people who’d written up their panettone adventures mentioned using Peter Reinhart’s recipe from the Bread Baker’s Apprentice.  His starter uses buttermilk in place of water, which seemed like an intriguing idea to me.  I’ve recently begun replacing the water in my bread recipes with the whey I have leftover from various cheese-making experiments.  Since whey is similar to what buttermilk used to be before it became the modified food-starch and carageenen-laden cultured skim milk you find in the grocery store these days, I thought it might work here.

And I was right.

Panettone
prep time: 18-24 hours
bake time: 45 minutes
yields: 1 large loaf
Ingredients
1/2 Tablespoon dry  yeast
1/4 cup warm whey (110 – 115 degrees F)
1/2 cup flour
1/2 cup golden raisins
1/2 cup dried cranberries
1/4 cup apple cider
1 Tablespoon honey or agave nectar
5 tablespoons butter, room temperature
2 eggs
4 egg yolks
3/4 cup sugar
1/4 cup warm whey
   (110 – 115 degrees F)
1 tablespoon vanilla
4-4 1/2 cups flour
1/2 cup chopped candied citrus peel
  1. Begin by combining yeast, 1/4 cup of warm whey and 1/2 cup of flour in a container.  Stir to combine thoroughly and let sit for at least 6 hours or overnight (mine sat for about 8 or 9 hours).
  2. Combine raisins, cranberries, apple cider and honey or agave nectar in a bowl and let soak while the starter is resting.
  3. After the 6-hour window has passed, drain the liquid from the fruit and press to remove as much moisture as possible.  Set aside.
  4. In a large bowl, combine the softened buttter, eggs, egg yolks, sugar, 1/4 cup warm whey and vanilla.  Stir to thoroughly combine.
  5. Add the starter to the egg mixture and stir to combine
  6. Gradually add the flour, sifting one cup at the time into the bowl an stirring to combine before adding the next cup.
  7. Once last cup of flour has been added, you may have to mix by hand to incorporate.  
  8. Turn the dough out onto a floured surface and knead vigorously until the dough forms a smooth ball – about 10 minutes.
  9. Butter a large bowl, place the dough in there and turn to coat both sides with butter.  Cover the bowl with plastic wrap.  Set in  a warm place to rise for at least 6 hours (mine rose overnight, and actually over-rose the bowl I put it in – oops!).
  10. To make the panettone mold, I used an 8-inch cake pan with 2 1/2-sides, and made a tall collar out of parchment paper – the whole thing was probably 10-inches tall by the time I got done with it.
  11. Butter/spray your panettone mold thoroughly
  12. Punch down the risen dough and turn it out onto a lightly floured surface.
  13. Shape the dough into a rectangle and sprinkle the raisins, cranberries and candied citrus over the surface.
  14. Fold the dough in thirds, covering the fruit, and knead it to fully and evenly distribute the fruit (this was a messy process, and required me to continually add more flour to keep the dough and fruit from sticking to my board.  In the end it yielded a fairly homogeneous mixture).
  15. Place the dough in your prepared pan and allow it to rise for at least another hour (I let mine go for a couple of hours, while I was running last-minute Christmas errands).
  16. Preheat your oven to 375F.
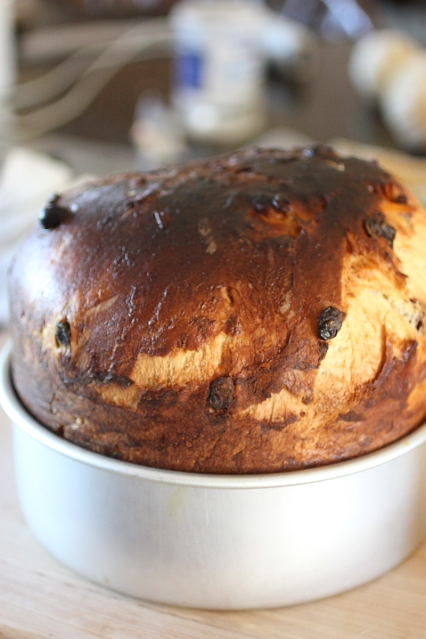
  17. Cut an X in the top of the dough and place the panettone in the oven to bake at 375F for 15minutes (the top element of my oven gets really hot, and tends to burn things if I’m not careful.  After the first 15 minutes, I had to cover the panettone with foil to keep it from burning to a crisp.  As you can tell by the pictures, it got pretty brown in that first 15 minutes).
  18. Lower the temperature to 350F and bake for another 30-35 minutes, or until a long skewer inserted in the middle comes out clean.
  19. Allow to cool on a rack on the countertop for 30 minutes before removing it from the mold.

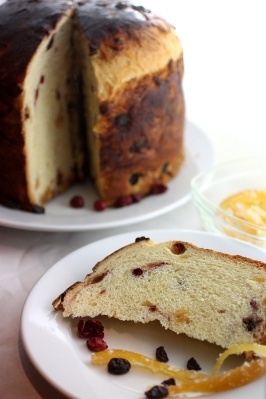
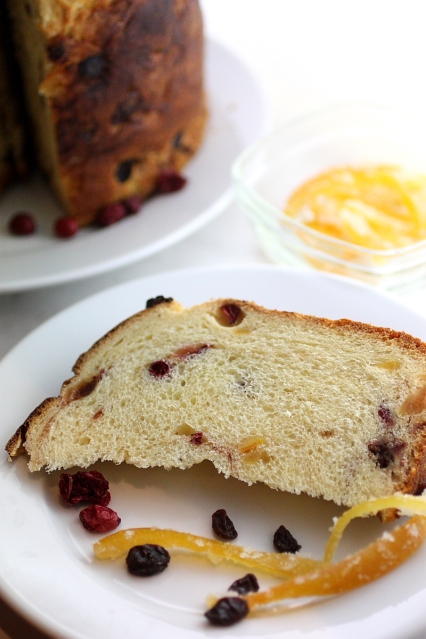
What resulted was a lovely, light, moist loaf of panettone.  It isn’t too sweet, and it has just enough fruit in it so that you can taste it, but it’s not overpowering.  I think it will make a wonderful french toast on Christmas morning.

If I don’t eat it all before then.

Try it and let me know what you think!

Enjoy, and Merry Christmas!