Let’s Talk About Running {And Fig Cake}

This title may seem incongruous at first glance.   And possibly at second glance, too.  The truth is, I don’t care.  I want to talk about both, and this here is my blog, so I’m gonna do what I want to do.

So there.

Back in January, I made a commitment publicly – right here in this space – to complete the Couch to 5K program.  I haven’t really talked about it much since then, but that’s not because I haven’t stuck with it.   I ran (sort of) my first (and only) 5K back in March.  And I did run the majority of it, but I was unable (unwilling? unmotivated?) to actually RUN the entire time.

Even now, six months later, I’m still struggling to run more that two miles continuously.  And the truth of the matter is, I’m really not sure if it’s a matter of ability, or just a matter of will.  Because honestly?  I still don’t really like it.  I do it, but I haven’t yet learned to enjoy it.

Please don’t misunderstand – I can definitely tell a difference.  Both in my endurance, and in my body.  And I like that part.

I’m thinking that maybe I need to add some strength training to my routine, because it’s not so much that I get winded, or that my heart-rate is too high; it’s more that my legs start to feel like they weigh about a ton.  And you know, a ton is a lot.  So maybe some strength training would benefit.

This morning I went for a run around our neighborhood.  It was around 10 AM, and the day was just starting to heat up.  I felt pretty good when I started, and I managed to get to about the one-and-a-half mile point before I felt like I needed to take a little break.  I walked for 30-seconds or so, and then picked up the pace again.  I finished it out at a good pace, only stopping to walk the last little bit to cool down.  The problem is, I had really planned to do three miles when I set out from the house. Somewhere along the way, I talked myself out of it and ended up only doing two.

Why do you think that is?  If you run, how do you stay motivated to keep going?  What kinds of strength training do you do?  Do share – maybe I’ll gather some inspiration and motivation from your suggestions.

As a thank you in advance, I’ll share this fig bundt cake with you.  Figs are good for you – especially for runners, as they contain high levels of potassium and fiber.  So, you know, this cake is kind of healthy.  Sort of.

As I was running yesterday, I was contemplating what to take as a dessert to a late lunch/early dinner (dunch?) at my in-laws’ house.  They had graciously kept our boys overnight on Saturday so we could have a grown-ups-only night with some friends and family.  I wanted to contribute a little something as a token of gratitude for their willingness to open their home to our two hooligans.

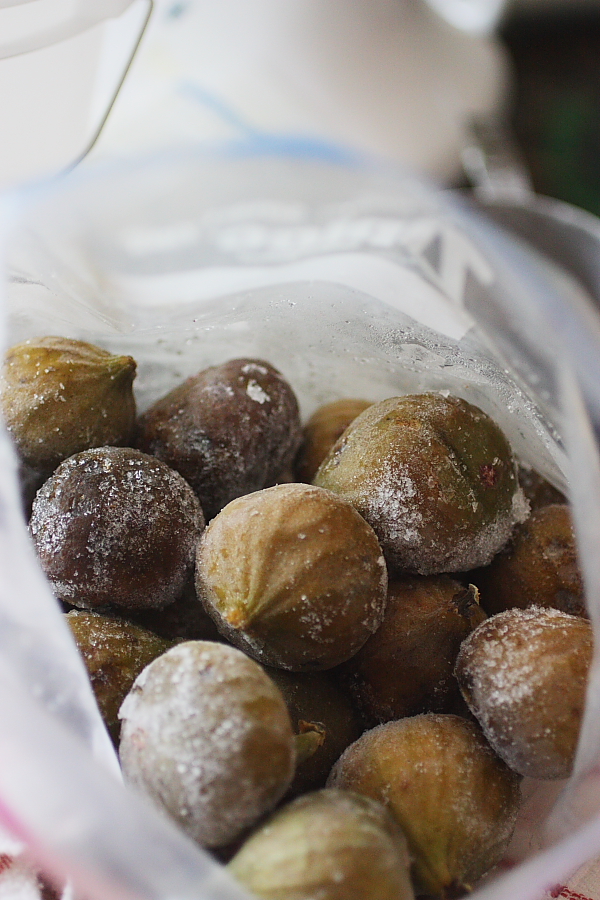
My mind kept settling on some figs I had put in the freezer back in June after spending an afternoon plucking them from our neighbor’s tree.  I decided on this simple bundt cake that uses fresh fig puree, and I was pleased with the outcome.  The texture was a little funny, more like a steamed pudding than a cake, but that’s probably more because I transported it almost directly from the oven in a cake carrier, so it sat in it’s own condensation for a while.  You won’t have the same problem if you allow it to cool completely before serving.  The flavor is delightfully figgy, and it’s not at all too sweet.  It would be especially nice for breakfast with a cup of coffee.

Fig Bundt Cake with Honey Butter Glaze (adapted from this recipe at Andrea Meyers’ Blog)

prep time: 15 minutes

bake time: 45-50 minutes

yields: 12-15 servings

Ingredients

Fig puree

  • 1 lb figs, destemmed and pureed in the food processor

Cake

  • 2 sticks butter, softened
  • 2 cups honey granules (can use granulated sugar)
  • 3 eggs
  • 2 cups fig puree
  • 1 teaspoon vanilla
  • 3  cups flour, sifted
  • 1 teaspoon cinnamon
  • 1 teaspoon nutmeg
  • 2 teaspoons baking soda

Glaze

  • 1/4 cup honey
  • 3 Tablespoons butter

  1. Begin by preheating the oven to 325F and greasing and flouring a 12-cup bundt pan
  2. Cream together the butter and honey granules using an electric stand mixer with a paddle attachment
  3. Add the eggs, one at the time
  4. Add the fig puree and the vanilla
  5. Whisk together the flour, cinnamon, nutmeg and baking soda
  6. Add flour mixture slowly to the fig mixture
  7. Scrape batter into prepared pan
  8. Bake at 325F for 45-50 minutes, or until a skewer inserted into the center of the cake comes out clean
  9. Turn out and cool on a cooling rack
  10. Prepare glaze by placing the honey and butter in a small saucepan over medium heat.  Cook until butter has melted and mixture is warm
  11. Glaze cake while it is still slightly warm
  12. Enjoy!

Honey, Cake {Honey Cake}

First, let me just say that we’re not big on terms of endearment in our house.  We don’t call each other Sweetheart or Babycakes or Darlin’.  Or, god forbid, Lover (I think I just threw up in my mouth a little). Sometimes I’ll call my husband stinky, but that’s mostly a descriptor and not so much a term of endearment.

But today’s his birthday, so I’m throwing caution to the wind.

Honey, this cake’s for you.

Happy Birthday, Loverboy.

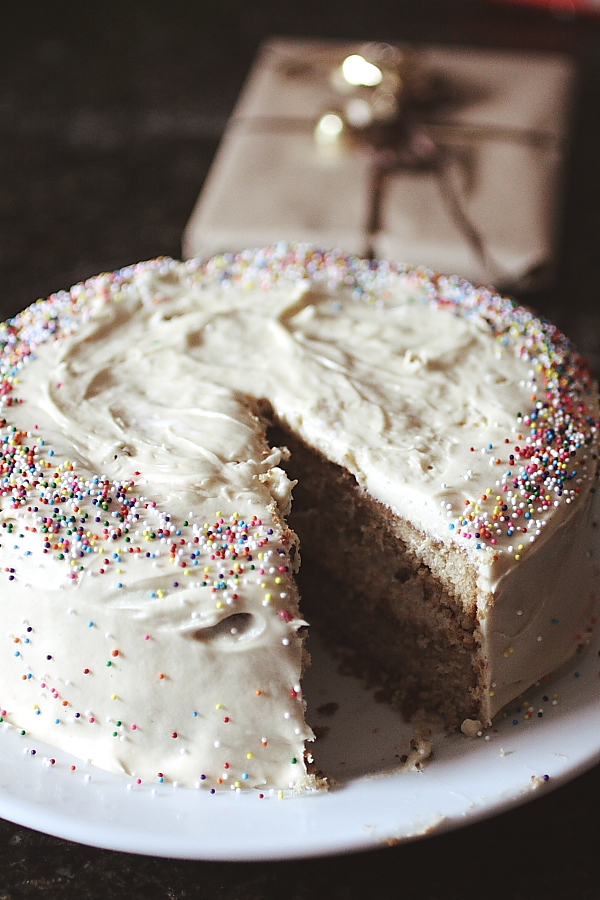
I married a man whose ideal dessert is yellow cake with white icing, so sometimes I like to change things up a bit in the flavor department.  This year’s cake is a variation on a basic buttermilk cake, but it uses honey granules in place of granulated sugar, and raw honey and honey granules in the cream cheese frosting.  It’s a honey cake.  For my honey.

I think what I like most about honey is that it has a sort of savory quality.  It’s sweet, but also a little salty.  Or musky.  Or earthy.  Or something. It has a complex flavor profile is what I’m getting at.  It works well in this cake, playing against the sour tang of the buttermilk and the cream cheese, and adding a slightly salty note to the whole thing.  It’s almost like a salted caramel, without the caramel or the salt.

It’s tasty, and I think you’ll like it.

Honey Cake with Honey Cream Cheese Frosting
prep time: 30 minutes (total, cake and frosting)
bake time: 25 minutes
yields: 2 eight or nine-inch layers

Ingredients

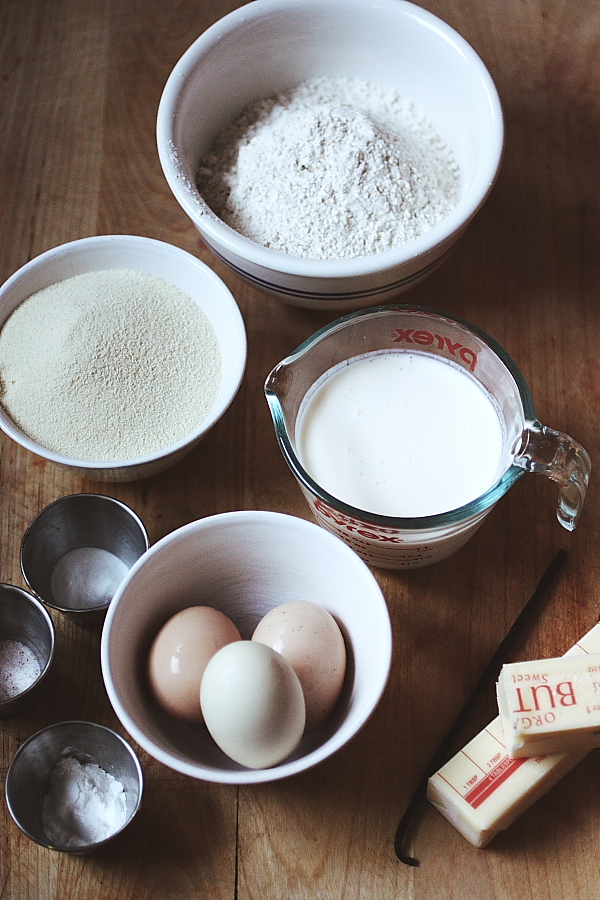
  • 3/4 cup butter (1 1/2 sticks)
  • 1 1/3 cups powdered honey granules
  • 3 large eggs
  • 1/2 vanilla bean, scraped
  • 2 1/3 cups sifted whole-wheat pastry flour (I used freshly milled here)
  • 1 1/2 teaspoons baking powder
  • 1/2 teaspoon baking soda
  • 1/4 teaspoon real salt
  • 1 cup cultured buttermilk
  • 1/2 cup raw honey honey
  • 1 vanilla bean, scraped
  • 16 oz. cream cheese
  • 4 oz. butter, at room temperature
  • 1 1/2 cups powdered honey granules

  1. Preheat oven to 350F and grease and flour two eight-inch round cake pans
  2. Sift together your flour, baking powder, baking soda and salt. Set aside
  3. In the bowl of your electric mixer, beat 3/4 cups room temperature butter on high speed until light and fluffy
  4. Slowly add 1 1/2 cups of honey granules, beating on high speed for 3-5 minutes
  5. Beat the eggs together and slowly add, taking about 2 minutes
  6. Add 1/2 a scraped vanilla bean and mix to incorporate.
  7. Add the flour mixture in three parts, alternating with the buttermilk in two parts – begin and end with flour.  Scrape the sides of the bowl as necessary.
  8. Divide the batter evenly between the two prepared cake pans and bake at 350F for 20-30 minutes (mine were actually quite dark at the 24 minute mark).
  9. While cake is baking: combine 1/2 cup honey and scraped vanilla bean in a small saucepan.  Add a tablespoon of water and stir to combine.  Heat over low heat until it comes to a simmer.  Remove from heat and allow to cool
  10. Remove cake layers from the oven and allow to cool in the pan for 5-1o minutes.  Turn out onto a cooling rack and cool to room temperature.
  11. Brush the tops of your cake layers with honey/vanilla mixture.  Reserve the remainder to add to the frosting.
  12. For the frosting: place the cream cheese and 4 oz. of butter in the bowl of your electric mixer.  Beat on high speed until light and fluffy.
  13. On medium speed, slowly add the honey/vanilla mixture, scraping down sides of bowl as necessary.
  14. Add powdered honey granules with mixer running.  Scrape down sides of bowl as necessary.
  15. Frost cake layers as desired.
  16. Enjoy.

Butternut Squash Seed Oil and Quinoa Cakes

I love seed oils.  They’re all so unique – some have a deep,rich, nutty flavor, and others are clean and mild.  I’ve long been a regular user of grapeseed oil, a flavor neutral oil with a high smoke point perfect for high-heat cooking, but also good in light salad dressings.  I also enjoy toasted sesame seed oil, where a little goes a long way in the flavor department.

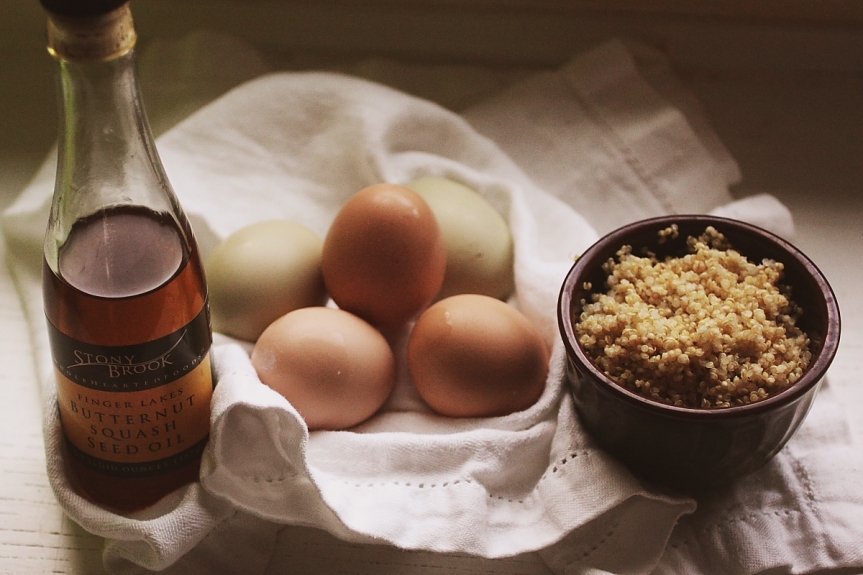
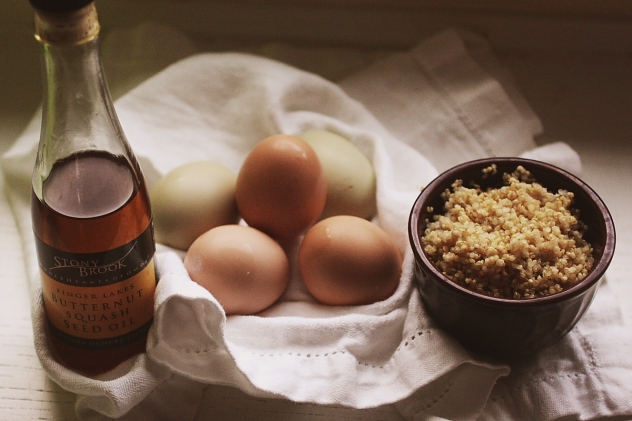
When I heard that Marx Foods was running a seed oil review contest, I knew I wanted to get in on it.  They have recently begun carrying Butternut Squash Seed Oil and Delicata Squash Seed Oil, and were offering a complimentary bottle of one of the flavors in return for candid reviews.  I submitted my request, and was delightfully surprised when I was chosen to participate.  Within a week, a petite bottle of Butternut Squash Seed  Oil was delivered to my doorstep.

I first wanted to taste it on it’s own, so I uncorked the bottle and sniffed it.  It had a full, round scent – reminiscent of roasted nuts – with a slight vegetal undertone.  I poured a little out onto a plate, dipped the end of my finger in the oil and placed it on my tongue – the flavor was rich and nutty, with a hint of sweetness.  You could definitely taste the butternut squash flavor in the background, but mostly it reminded me of a toasted nut oil (like walnut or hazelnut), or even a mild sesame oil.

According to the Marx Foods website, these oils have a relatively high smoke point, so they’re appropriate for cooking, but are also good as dipping oils or in salad dressings.  I decided to put it to the test on both fronts, using it to fry up some savory quinoa cakes, and in a light salad dressing for a spinach and mixed green salad for dinner one night.

Quinoa Cakes, Fried in Butternut Squash Seed Oil and Clarified Butter

(based on this recipe from The Healthy Foodie, which I found via Pinterest)
prep time: 15 minutes
cook time: 15 minutes
yields: 8-10 patties

Ingredients

  • 2 3/4 cups quinoa, cooked in chicken or vegetable stock
  • 1/2 small white onion, finely minced
  • 1 1/2 cups whole wheat bread crumbs
  • 1 cup shredded extra sharp cheddar cheese
  • 2 whole eggs and 4 egg whites, beaten
  • 1 teaspoon salt
  • 1/4 teaspoon black pepper
  • 2 tablespoons ghee
  • 2 tablespoons butternut squash seed oil
  1. Combine the quinoa, onion, bread crumbs, cheese, salt and pepper.
  2. Add the eggs and stir to combine.
  3. Allow to sit for a few minutes so the bread crumbs can soak up the liquid.
  4. In a large stainless steel skillet, heat the ghee and butternut squash seed oil over medium heat.
  5. Carefully form the quinoa mixture into patties the size of the palm of your hand.
  6. Place them in the hot oil, cooking them for 4-5 minutes on the first side.
  7. Flip them over once they’ve browned and cook for another 4-5 minutes on the second side.
  8. Keep warm in the oven while you cook the rest.
  9. Serve over a mixed green salad, topped with a poached egg.

Butternut Squash Seed Oil Salad Dressing
prep time: 2 minutes
yields: 1/4 cup of dressing

Ingredients

  • 1 teaspoon mustard (spicy or dijon)
  • 1 teaspoon raw honey
  • 1 tablespoon champagne vinegar
  • 1 1/2 tablespoons olive oil
  • 1 1/2 tablespoons butternut squash seed oil
  • salt and pepper to taste
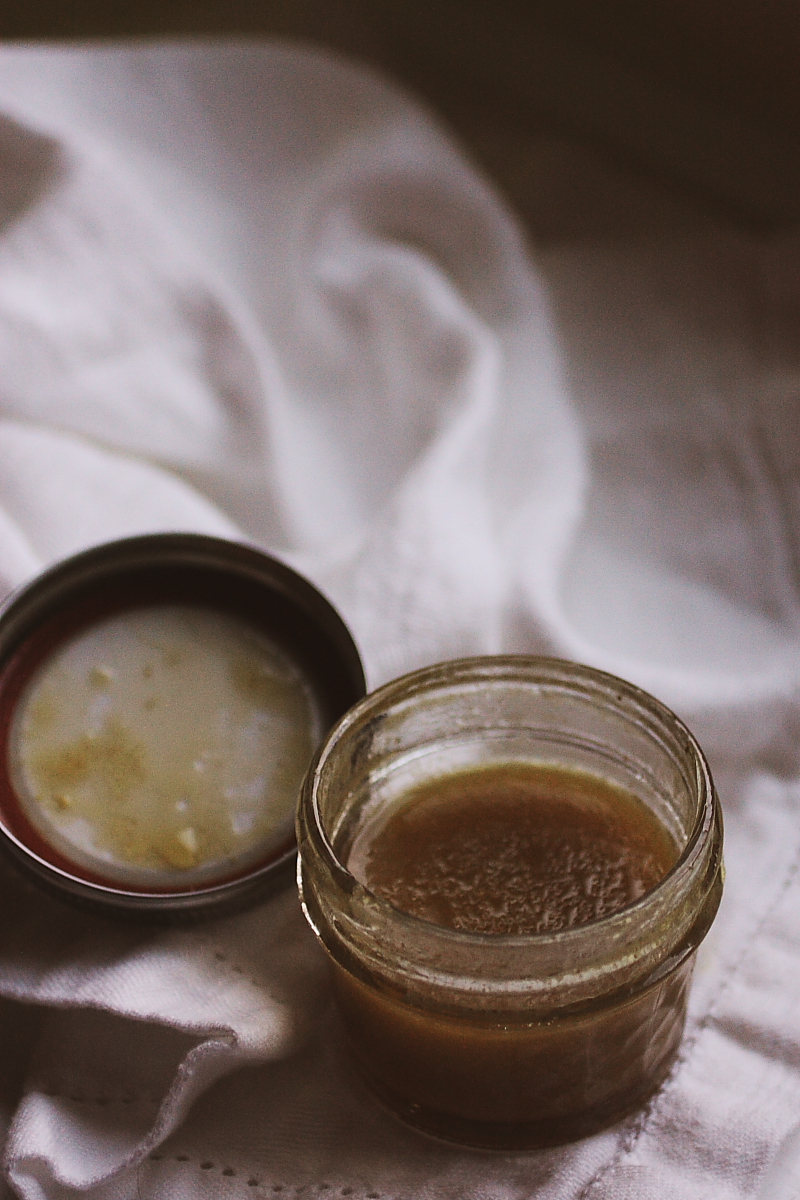
  1. Combine all ingredients in a small mason jar.
  2. Screw the lid on tightly and shake
  3. Toss with mixed salad greens
  4. Enjoy!
As a cooking oil,  it stood up well to the high-heat test, yielding a super light and crispy exterior on the quinoa cakes.  They had a nutty flavor, but it’s hard to say whether that came from the oil, or from the quinoa itself.  It’s also possible that the clarified butter washed out some of the butternut squash flavor.  Performance-wise, though, it held up – hardly smoking at all, even when I let the pan get a little too hot.

Where this oil really shone was in the salad dressing – you could taste the toasted, nutty flavor and the squash flavor was really nice.  The addition of the honey brought out the sweetness, and the mild champagne vinegar didn’t overpower it at all.  I definitely think this oil is better suited to raw applications than it is to cooked.  Although I could see it in place of a sage brown-butter sauce (or even as an addition to) with ravioli or pappardelle.  It’s nice and mellow, and the flavor can become overpowered easily.  If it’s allowed to stand on it’s own, though, it won’t disappoint.

Note:  While I did receive a complimentary bottle of Butternut Squash Seed Oil from Marx Foods, the opinions in this post are my own.

Once More, With Granola

We’re coming up on a long weekend.  Our school system has been generous, giving the children not only President’s Day, but the Friday prior as well.  Four whole days in a row, and we’re taking advantage of it by going on a little road trip.

Most of you probably know that traveling with children can be tricky.  Some kids are great – strap them in a booster seat, give them a book, some crayons and paper, or a movie, and they’re good to go (that’s my oldest).  Some kids, on the other hand, require a little more, shall we say, attention.  They get wiggly, antsy, bored, and, last but not least, impatient.  This can manifest itself in many ways.  In our case, our youngest expresses his displeasure by yelling, throwing toys and kicking the back of the seat in front of him.  Also, he’s not much of a car sleeper, so this behavior can go on indefinitely.  Pleasant.

Sometimes, snacks help.  Actually, most of the time, snacks help.  If he has food, he’s pretty happy.  That’s why I spent most of this morning attempting, once again, to make granola bars.

I say attempting, because I’ve tried and failed with granola bars many times.  This time around was a semi-success, which is good because we’re leaving tomorrow and I don’t have time to try, try and try again.

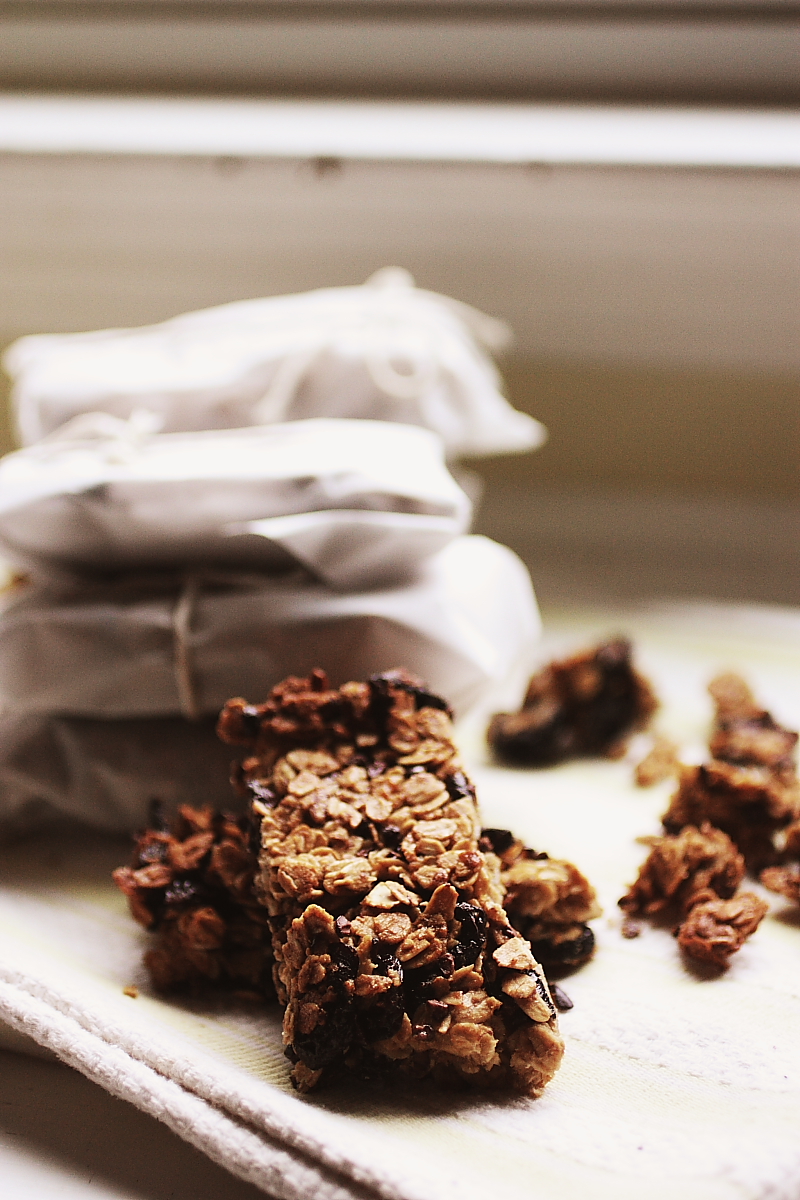
I wanted these to be relatively nourishing, since they will be our primary snack of choice over the long weekend.  Whole grains in the form of rolled oats and freshly ground flour, combined with unsweetened dried cherries, a very ripe banana, some raw Tupelo honey (courtesy Savannah Bee Company) and sucanat (dehydrated sugar cane), along with a relatively small amount of expeller-pressed coconut oil and some toasted cacao nibs come together to create a nutritionally-dense granola bar.

Also?  Tasty.

Banana Split Granola Bars
prep time: 10 minutes
bake time: 40 minutes
yield: 12 bars

Ingredients

  • 3 cups rolled oats
  • 1/3 cup whole wheat flour
  • 1/2 teaspoon unrefined sea salt
  • 1/4 teaspoon baking soda
  • 1/2 cup cacao nibs
  • 1/2 cup honey
  • 1/4 cup sucanat
  • 1/4 cup expeller-pressed coconut oil
  • 1 very ripe banana, pureed
  • 2 cups dried cherries
  • 2 teaspoons vanilla

  1. Preheat oven to 300F and butter a 9×13-inch baking dish.  Line it with parchment paper and butter the parchment paper.
  2. Combine the oats, flour, salt, soda and cacao nibs in a large bowl.
  3. In a saucepan over medium heat, combine honey, coconut oil, sucanat, banana puree, and dried cherries.  Cook for a couple of minutes, until coconut oil has melted and sucanat has dissolved.  The cherries should also plump slightly.
  4. Remove from heat and add the vanilla to the liquid ingredients.
  5. Pour liquid ingredients into dry ingredients and stir to combine.
  6. Press the granola mixture into the prepared pan and bake at 300F for 40 minutes, or until golden brown.
  7. Remove from oven and allow to cool in the pan.
  8. Once cooled, remove from the pan and slice into 12 bars.
  9. Enjoy!

These weren’t perfect – they still managed to fall apart somewhat when I went to slice them.  However, the flavor is really good, and the texture is nice and chewy.  The cherries, cacao nibs and bananas combine to give a flavor profile reminiscent of a banana split – sweet, tart, chocolatey – without being dessert-like.  I think they would be especially good with a cup or so of chopped nuts thrown in (I left them out because my husband might decide to try them, and he’s allergic), and maybe a touch more fat in the form of butter, peanut-butter, or just more coconut oil (I think the fat helps to bind them at room temperature).

I think these, along with some popcorn and sliced fruit, will go a long way toward taming the beast-like child on our road trip tomorrow.  Which will go an even further way toward maintaining my sanity.  And that’s a good thing.

Hen House Drama, a Timely Pardon, and Cornmeal Pancakes

Before I get started, I want to give a warm welcome and sincere thank you to any of you who found life, in recipes through Freshly Pressed.  I was completely surprised (pleasantly so) when I saw that one of my posts had been featured the other day.  I am beyond grateful for all of your thoughtful comments and words of encouragement.  If you like what you’ve seen so far, I invite you to keep up with the blog through Facebook, Twitter, or RSS feed.  You can also follow me on Pinterest

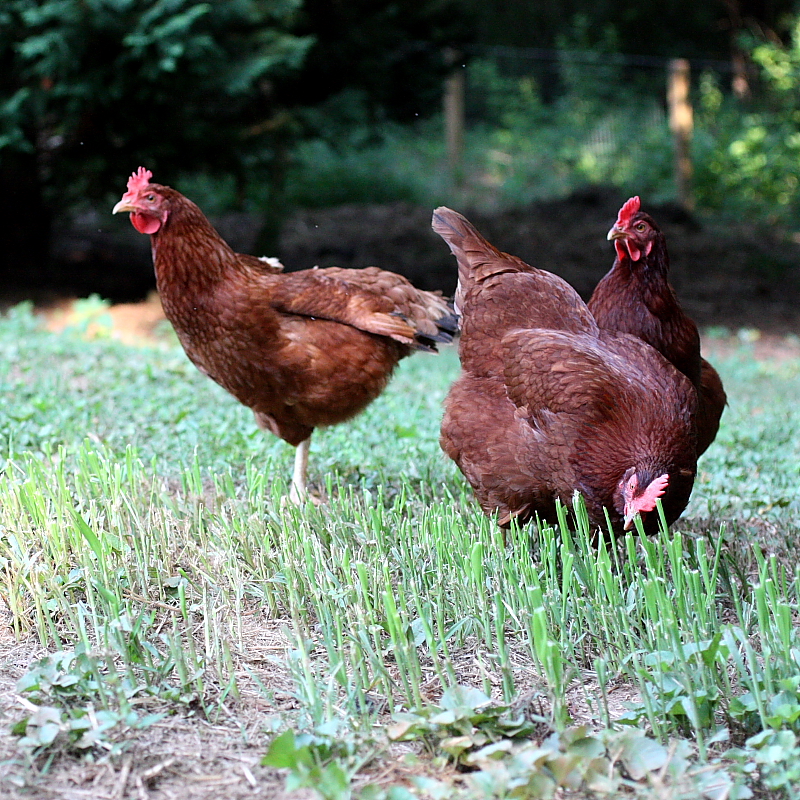
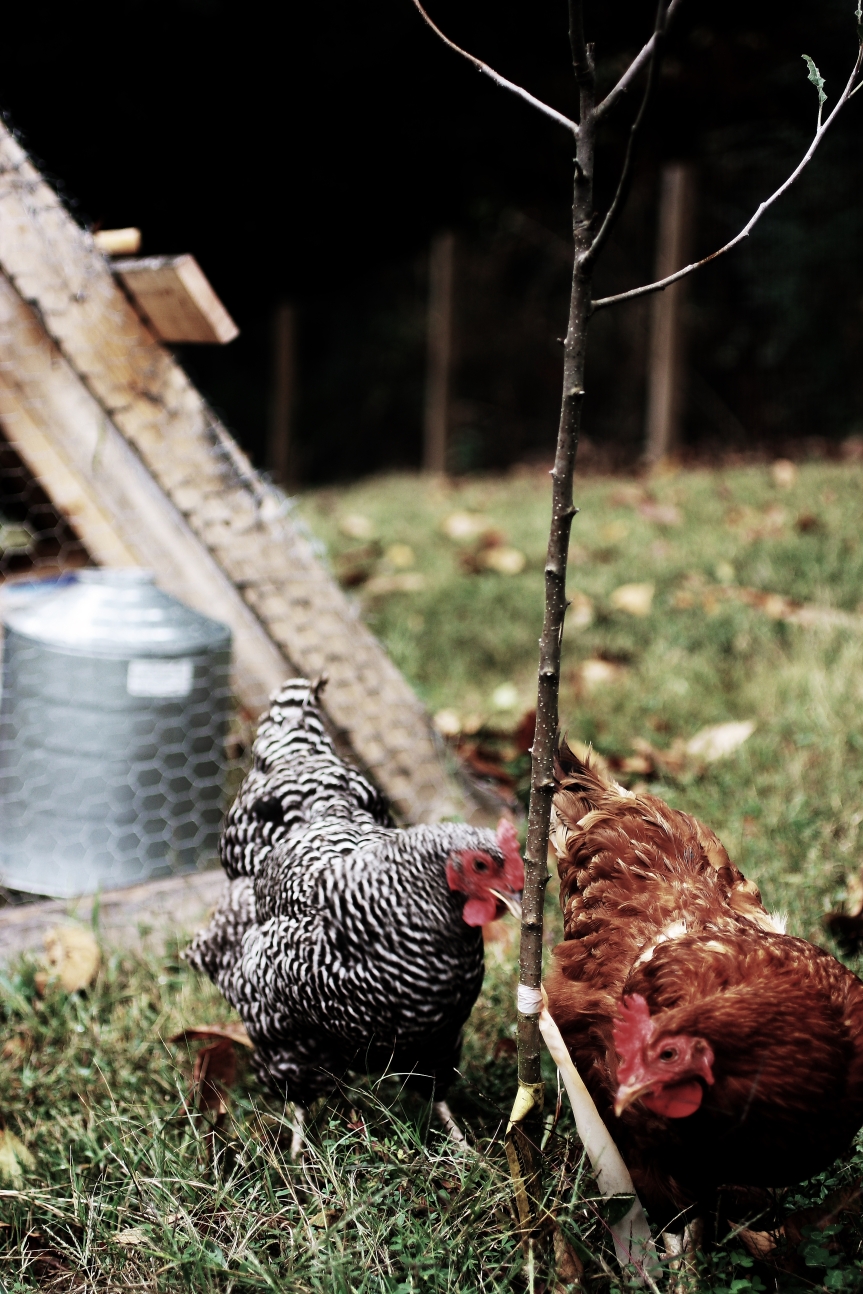
In the spirit of full disclosure, our adventures in backyard poultry rearing have not been without, um, shall we say,  challenges.  We started back in April with three Rhode Island Reds – Fred, Tweety and Sally.  Things seemed great at first – we were getting three eggs a day, the chickens seemed happy (we let them free range during the day, and put them back in the coop at night), and it wasn’t a tremendous amount of work.  We made sure they had food, water, and fresh air, and they provided us with a dozen eggs every four days. It seemed almost too good to be true.

And that’s because it was.  We lost Fred in August to what we believe was a black widow spider bite, and we lost Tweety in October to a predator of some sort or another.  We didn’t want Sally to be lonely, so we found her four new friends – Spot and Dot, two lovely black and white Barred Rock hens, and Fred, Jr. and Tweety, Jr., a couple of Ameraucanas.  We promised to keep them safe, well fed and watered, in exchange for eggs.  We were looking forward to four or five eggs a day, perhaps enough to share with our friends and neighbors.  This was in November.

At first, Sally wasn’t terribly keen on her new coop-mates.  In particular, she decided that Tweety, Jr. was her nemesis.  Every time that poor hen would get close to Sally, she would peck at her and pull her tail feathers out.  Tweety, Jr. became scared to leave the corner by the nesting boxes – she would huddle there, trembling, trying to make herself as small as possible.  Sally was like the schoolyard bully, exerting her dominance over the new kid on the block.  I’m not sure what it was about poor Tweety, Jr. (maybe it was her name), but after a while Sally left her completely devoid of tail feathers.

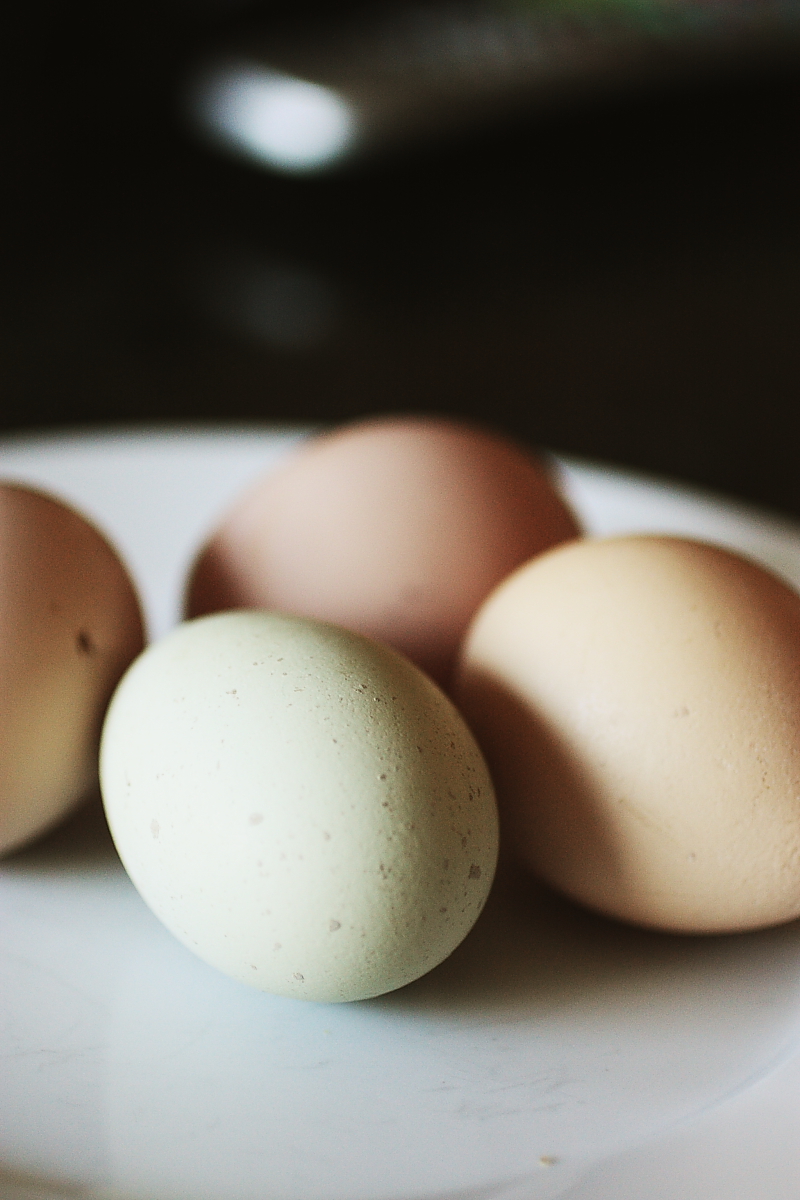
In addition to this little pecking-order drama, the egg production was not what we’d hoped it would be.  For a while, it was only Sally laying.  Then occasionally one of the Rocks would lay – either Spot or Dot.  We know it wasn’t an Ameraucana because all of the eggs were of the brownish variety – Ameraucana eggs are greenish blue (part of the reason we chose the breed).  From late October to late January, there was nary a green egg to be had.  We’d been told that the hens were 8 months old when we got them, so they should have been of prime laying age.  Had we been swindled?  Were these gals completely infertile?  Was the trauma being inflicted upon them by that bully Sally too much to handle?  We weren’t sure.  What we did know was that they were eating an awful lot of feed and not producing anything in return.

Over time, the drama subsided, and Tweety Jr.’s tail feathers began to fill in again.  Both Rocks began laying regularly, and things seemed to be on a more even keel in the hen house.  When the weather began to get cold (for those two days back in January) we decided we need to put a heat lamp in the coop to keep the water from freezing overnight.  The light seemed to make things even better – the egg production from Sally, Spot and Dot increased.  Tweety, Jr. and Fred, Jr., though?  Not so much.

My mother and my husband have “joked” on more than one occasion about sending the Ameraucana’s to the stew pot.  I chose to ignore them.

The other day I went out to the coop, as I do in the afternoon, and I lifted the door to the nesting boxes.  There, nestled in the straw, were four eggs.  Three brown and one green (!).

And there was much rejoicing.

The (theoretical) trip to the stew pot has been stayed.

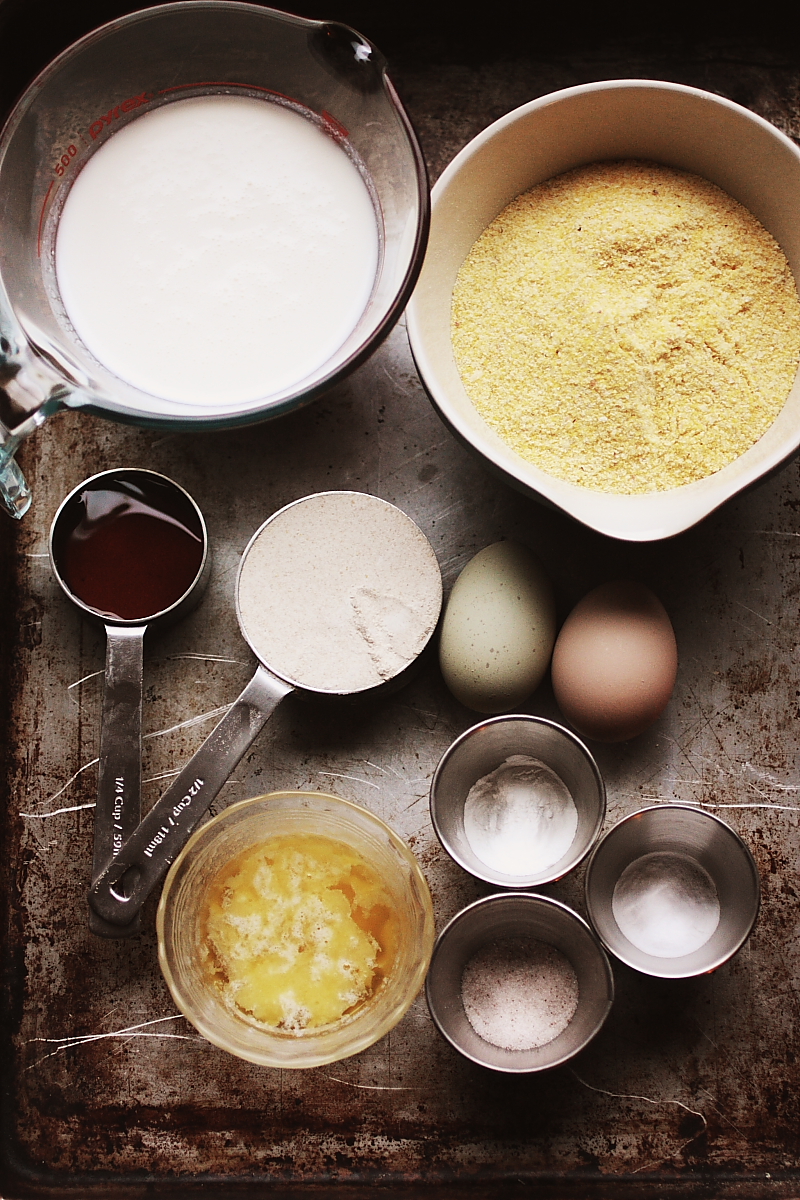
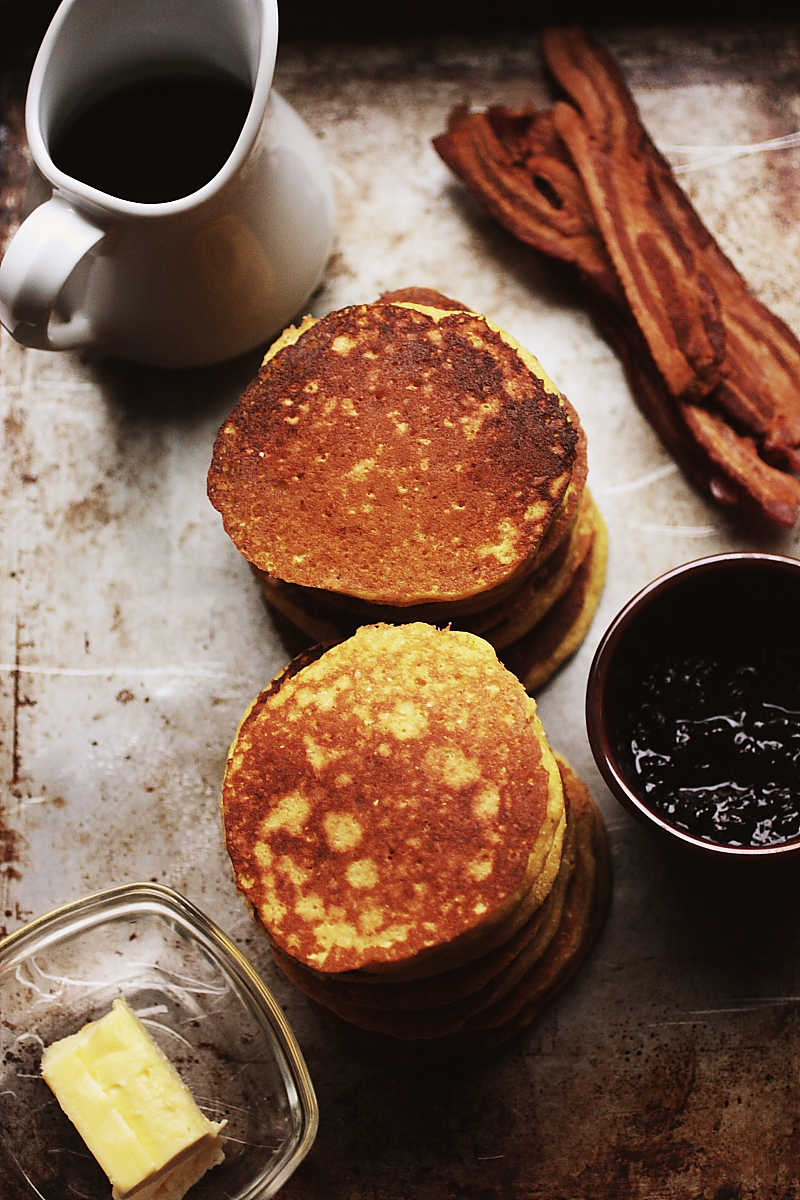
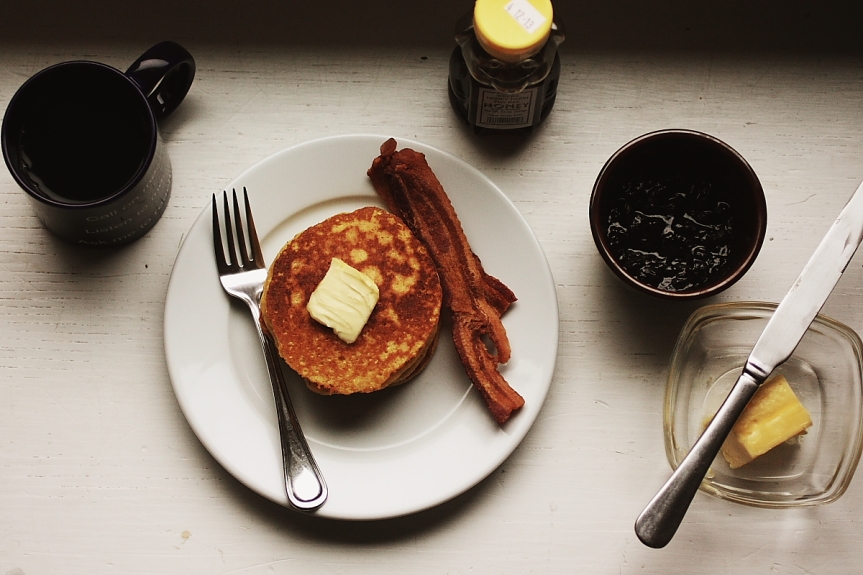
This morning I used that beautiful green egg in some cornmeal pancakes I’ve been wanting to tell you about.  I made them for the first time a couple of weeks ago, and I’ve been thinking about them ever since.  I make whole-grain pancakes all the time – usually a mixture of rolled oats and freshly ground wheat – but this is the first time I’ve really delved into the cornmeal variety.  I think it’s because I’ve been getting all of this lovely freshly ground meal from Rockin’ S Farms – I really want to showcase it.  The sweetness of the corn lends itself really nicely to a pancake application.  Together with some local raw honey, cultured buttermilk, and those coveted eggs from our backyard flock, they make for a delightful breakfast. 

Honey, Buttermilk and Cornmeal Pancakes
prep time: 5 minutes
cook time: 20 minutes
yields: 16 4-inch pancakes

Ingredients

  • 1 1/2 cups cornmeal
  • 1/2 cup whole-wheat flour
  • 1 1/2 teaspoons baking powder
  • 1/4 teaspoon baking soda
  • 3/4 teaspoon salt
  • 1 2/3 cups buttermilk
  • 1/4 cup honey (I’ve also used molasses here, for a deeper flavor)
  • 2 eggs
  • 3 Tablespoons melted butter
  1. In a large bowl, whisk together the dry ingredients
  2. In a separate bowl, whisk together the buttermilk, honey, eggs and melted butter
  3. Add the wet ingredients to the dry ingredients and stir to combine.  Do not overmix.
  4. Ladle by quarter-cupfuls onto a hot griddle.  Allow to brown on the first side before flipping to the second side.
  5. Serve warm with warm maple syrup, honey or fruit compote (I used some warm blueberry jam).
  6. Enjoy!
Bread, My Fickle Mistress

I’ve been baking all of our family’s bread for the last year, and it has been one roller-coaster of a ride. Every two weeks or so, I bake four loaves of bread.  My husband and oldest son eat a sandwich for lunch every weekday. Sometimes we have toast for breakfast.  Sometimes I just like to eat a piece of bread with butter for a snack.  We like bread.

When I first started the process of grinding all of our wheat and baking all of our bread, I was pretty successful.  I used this recipe, and it proved to be a good one for about the first six months.  Then something happened.  I’m not really sure what it was, but my loaves went from being light and soft to dense and hard.  The gluten didn’t develop, they tasted a little too yeasty and they fell apart easily when you tried to slice them.

But, I soldiered on.  And the boys were troopers – they kept eating their daily sandwiches on this failed bread-like substance.  I tried a variety of things to help remedy the problem – more liquid, less liquid, a different combination of flours (more red wheat, less white wheat, more kamut, some soft white wheat), honey vs. molasses vs. maple syrup vs. sucanat, butter vs. coconut oil – you name it, I tried it.  Every so often, I’d get a good loaf or two, but the next time I tried to replicate what I’d done, it was back to dense bricks.

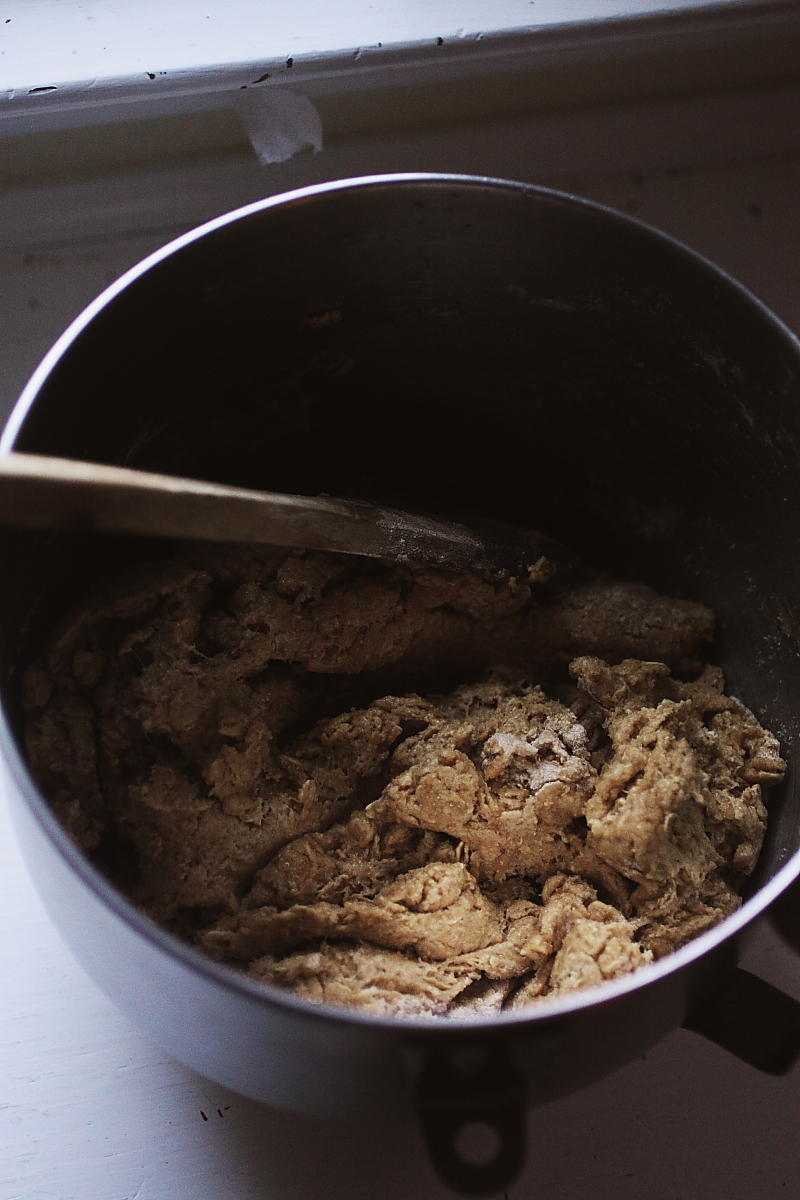
I could even tell in the mixer that it was going to be a failure.  Instead of long, rubbery strands of gluten, the dough would just come apart in short, stubby wads.  Windowpane test?  Forget it. I was beginning to think that maybe bread and I just weren’t meant to be.

Sigh.

Then the other day, I saw this post for Oatmeal Sandwich Bread over on Art & Lemons.  She described it as “soft” and “pillow-like,”  and I knew I needed to try it.

Her recipe was based on one from Kim Boyce’s Good to the Grain

Note to self: buy this book.  Soon.

Anyway, the recipe seemed simple enough, and it used a technique I hadn’t tried before – autolysis.  This is where you mix the dry ingredients and liquids together and let them rest for 30 minutes before adding the salt and kneading.  From what I gather, this allows the flour to better absorb the liquid, thereby allowing for more effective gluten development.

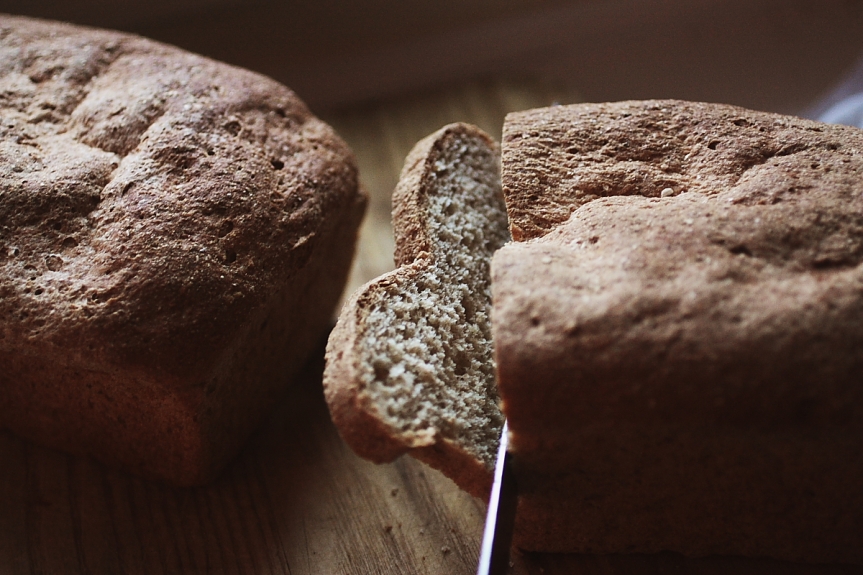
The first batch I baked came out perfectly.  Soft, pillow-like loaves with tons of flavor and a beautiful open crumb.

The second batch?  Yea – not so much.  Flat failures.

Bread, why do you hate me so?

But once again, I soldiered on.  I turned to ye olde interwebs to discover the source of my problem, and I think perhaps I’ve been overworking my dough.  It seems, based on a number of sources, that if you over-knead your bread or if you let it over-rise, the gluten strands can break.  Who knew?  I’ve been abusing my bread all this time. Here I was blaming the bread, when all along it was me.

This time, the third time really was the charm.  This bread is kind of spectacular.  I mean, if sandwich bread can be spectacular. I think I’m in love (again).

Whole Grain Sandwich Bread (adapted from this recipe at Art & Lemons)
prep time: 45 minutes
rise time: 2 hours
bake time: 30 minutes
yields: 2 1-lb. loaves

Ingredients

  • 2 cups warm water
  • 3 Tablespoons honey (could also use maple syrup or molasses)
  • 4 Tablespoons cultured butter, melted and cooled (could also use coconut oil)
  • 1 Tablespoon active dry yeast
  • 4 cups freshly ground hard white wheat, sifted
  • 2 cups rolled oats
  • 1 tablespoon unrefined sea salt
  1. Combine water, honey, butter and yeast in the bowl of your electric mixer and let sit for 5 minutes so yeast can bloom
  2. Add the flour and oats to the water mixture and stir to combine.  Let rest for 30 minutes.
  3. Add the salt and knead in the mixer, using the dough hook attachment, for 6 minutes.  Dough will be a little sticky and should slap the sides of the bowl as it mixes.  It should be very elastic (long, rubbery strands of gluten) after six minutes.
  4. Remove the bowl from the mixer, cover with a damp towel, and let rise in a warm place for one hour (I usually preheat my oven to 150F, then turn it off and set the bowl in the warmed oven).
  5. After an hour, the dough should have doubled in volume.  Scrape it out of the bowl onto a lightly floured surface.
  6. Grease two 1-lb. loaf pans
  7. Divide the dough in half and knead one half a few times, forming it into a loaf-shaped rectangle.  Repeat with the other half
  8. Place the dough in the loaf pans and cover loosely with plastic wrap
  9. Let rise in a warm place for one hour, or until doubled in bulk.
  10. Preheat the oven to 350F
  11. Carefully remove the plastic wrap and transfer the risen loaves to the oven (take care not to deflate them)
  12. Bake for 30 minutes, rotating them after the first 15 minutes to ensure even baking.
  13. Remove from the oven and allow to cool in the pans for 10 minutes, then turn out onto a cooling rack.  Allow to cool for at least a couple of hours before slicing.
  14. Enjoy!
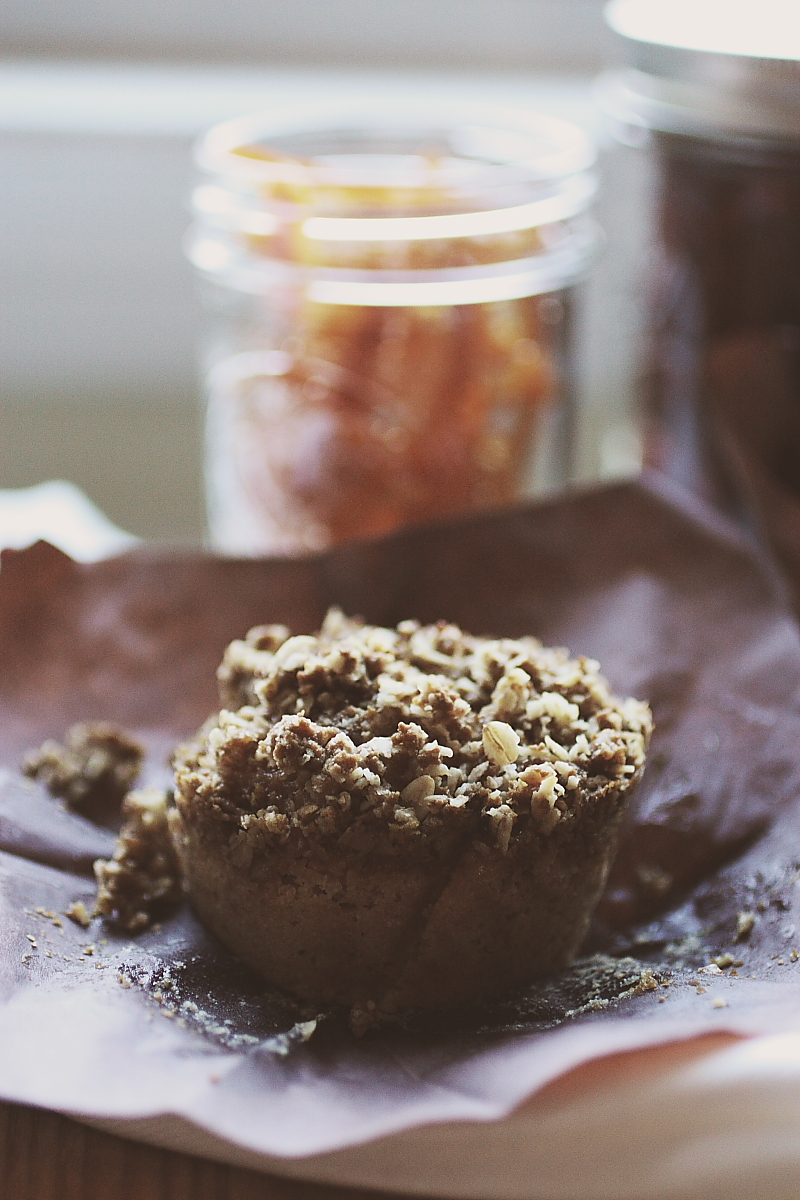
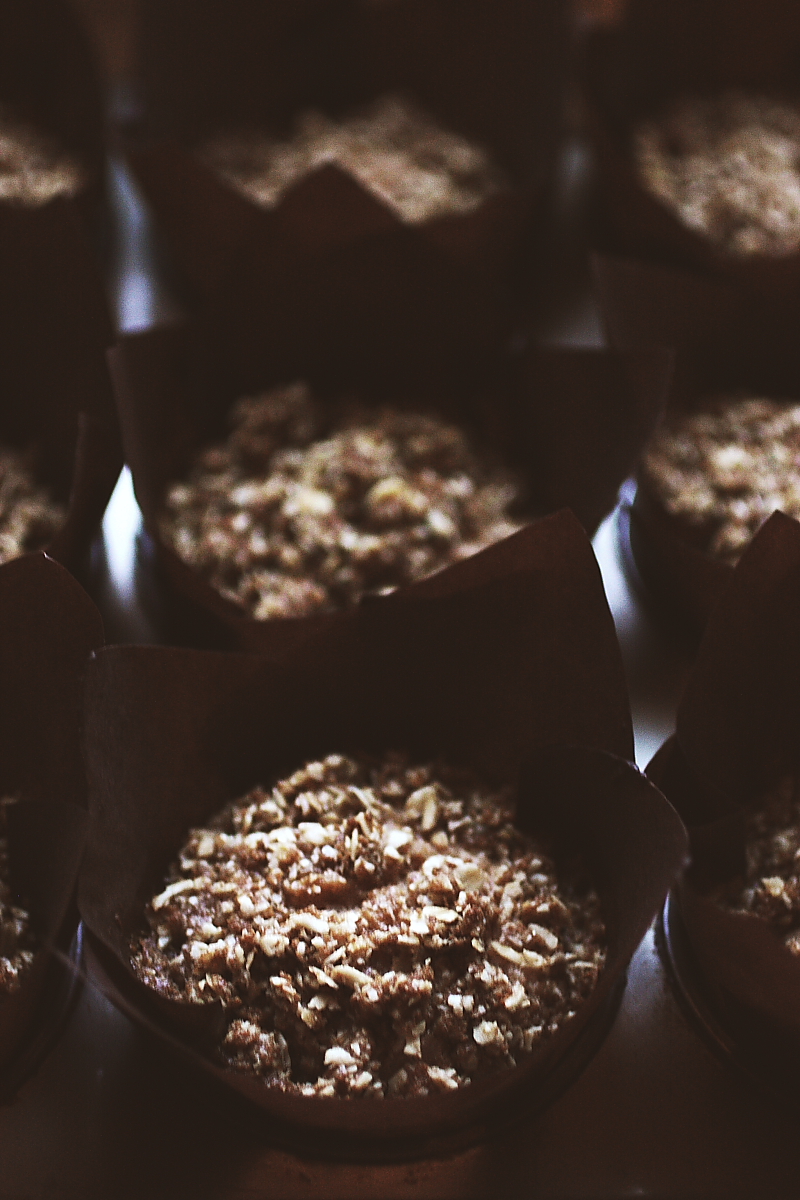
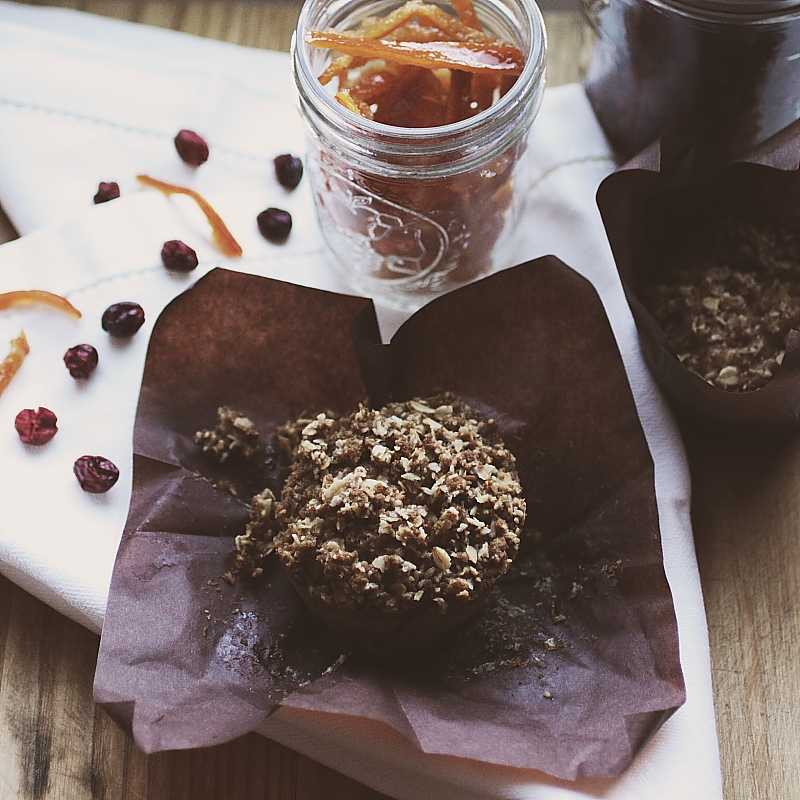
Streusel-topped Cranberry Orange Muffins

Friends, I just can’t accept the fact that it’s the middle of December.  I just. can. not.  How is it that there are fewer than two weeks until Christmas?  Where has the month gone?  I need for time to just slow down. Take a breather. Relax.

Seriously.

For one thing, it just doesn’t feel like December.  It was 65 degrees outside today.  There I was, out in the garden, picking collards and broccoli and lettuce.  Relishing the warmth. Feeling slightly off kilter because it IS December, after all, and my garden is still offering up all sorts of goodies.

December.  Last year it snowed on Christmas.

I’m kind of torn.  I love the fact that the kids can still play outside in the afternoons, but I miss having a fire every night in the fireplace.  I love the lovely greens still coming out of the garden, but I would also love it if it snowed one day soon.  I want the best of both worlds.  I guess I just need to learn to be thankful for what I’ve got.

I had a meeting the other morning at the school where I used to work.  I was supposed to be there at 8 a.m., but Atlanta traffic had other plans for me.  As I was sitting there, surrounded by every commuter in the metropolitan area, I praised the fact that my new job is three miles from my house.  I used to drive 50 miles round-trip.  Every day.  Now it’s ten at the most – and that’s because I have to drop the little one off at day-care beforehand.  I know I’m thankful for that.

Because it was an 8 o’clock meeting, I wanted to provide some goodies that we could munch while we chatted.  I had recently dried a bunch of cranberries in my dehydrator, and candied some orange zest using honey in place of the granulated sugar.  I love the combination of orange and cranberry, so I decided to bake a variation on this crumb cake I made last year, but making muffins instead.

Streusel-topped Cranberry Orange Muffins
adapted from the Tate’s Bake Shop Cookbook
prep time: 15 minutes
cook time: 35-45 minutes
yields: 1 9-inch square cake
Ingredients
For the topping:
1/2 cup sucanat (or firmly packed dark brown sugar))
1 cup old fashioned oats
1/2 teaspoon cinnamon
5 tablespoons unsalted butter, cut into tablespoons
generous pinch of salt
For the batter:
2 cups freshly ground flour (or whole wheat pastry flour)
1/2 cup plus honey granules (or granulated sugar)
1 teaspoon baking powder
1/4 teaspoon cinnamon
1/4 teaspoon salt
1/3 cup sour cream
1/3 cup half and half
2 large eggs
1/4 cup coconut oil
4 large pieces candied orange peel, chopped

1 cup unsweetened dried cranberries, reconstituted in 1/2-cup of  apple cider

  1. Preheat the oven to 350F.  Line a 12-cup muffin tin with paper liners.
  2. In the bowl of your food processor, combine the brown sugar, oats, cinnamon, and butter.  Pulse the it until the mixture resembles coarse crumbs.  Set the mixture aside in the refrigerator.
  3. Add the reconstituted cranberries, along with the liquid, and the candied zest to the food processor.  Process until the berries and zest are chopped
  4. In a medium bowl, combine the flour, 1/2 cup of sugar, baking powder, cinnamon and salt.
  5. In a large bowl, co tmbinehe sour cream, half and half, eggs,  and oil
  6. Add the flour mixture to the sour cream mixture and stir just to combine.  Fold in the cranberry mixture.
  7. Spoon the batter into the prepared muffin tin.  Sprinkle the topping evenly over the batter.
  8. Bake for 15-20 minutes or until a cake tester or toothpick comes out clean.

What’s nice about these is that the muffins themselves are not too sweet (the tart cranberries take care of that), so the sweet streusel topping really contrasts nicely with them.  The original recipe called for using fresh cranberries that have been chopped in the food processor, but I think the dried ones work equally as well.  I definitely like the addition of the candied zest.  They were a big hit with my kids, and with my fellow meeting attendees.  I think they would also be a delightful addition to your holiday breakfast or brunch table, if you do that sort of thing.

The tart that replaced pecan pie in my Thanksgiving repertoire

As a child, I hated pecan pie.  I think it was because (as I’ve come to understand in my adult years) the filling was often overcooked to the point of being curdled.

There is a delicate balance in pecan pie, a fine line that bakers walk between silky smooth custard filling and curdled eggy mess.  I’ve encountered very few pecan pies in my life that have been perfectly silky smooth, and have only been able to personally achieve it once.

It really relies on the baker taking the pie out of the oven when the center is still almost liquid, and most home cooks (myself sometimes included) are wary of serving undercooked custard to their friends and family.

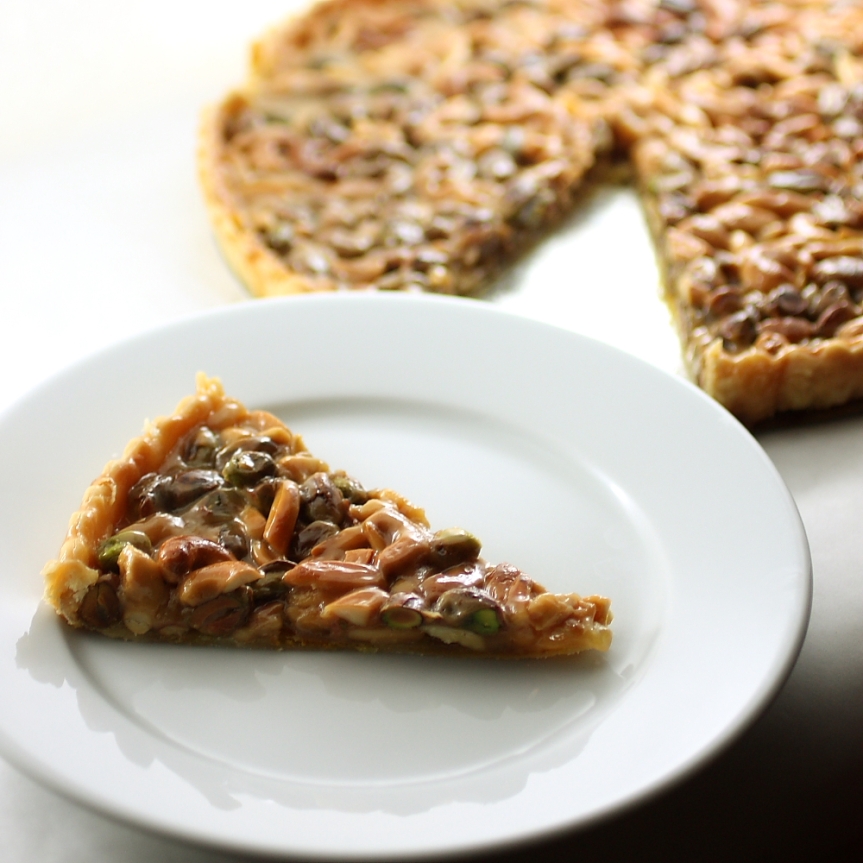
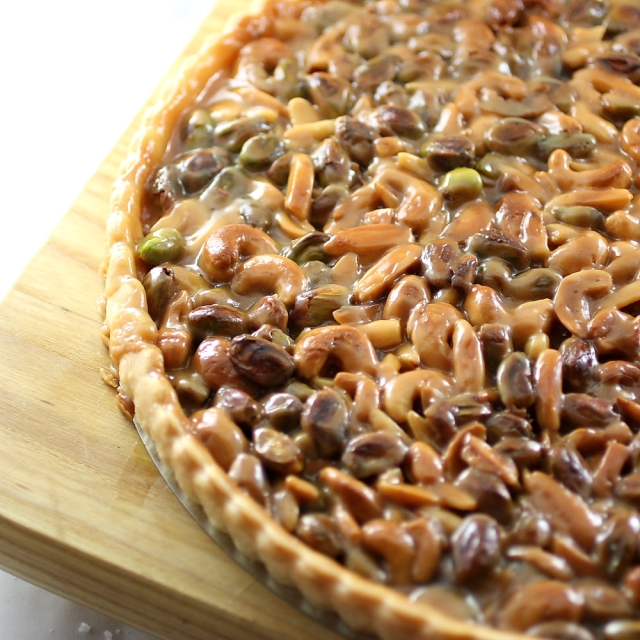
Luckily, I discovered a tart about six years ago that incorporates nuts without using an egg-based filling to hold them all together.  It was featured in the October 2004 issue of Bon Appetit magazine, and I think it was the photo that really drew me in.  Those lovely green pistachios, suspended in creamy caramel, nestled tightly between chunks of walnut and slivers of almond, just spoke to me.  The combination of honey and rosewater in the caramel, and the orange zest in the crust, makes for a flavor profile reminiscent of baklava, but so much more complex.

Over the years, I’ve adapted the recipe to suit my tastes (I replaced the walnuts with cashews, and sometimes I use store-bought pie crusts that I roll orange zest into to mimic the original. You could also use your favorite short-crust recipe here), and it has become a staple of our Thanksgiving dessert table.  Since we’ve incorporated this tart into our menu, the pecan pie has sadly gone by the wayside.

This year, I almost forewent making it, simply because shelled pistachios were $1 an ounce at the grocery store.  It almost seemed ludicrous to spend that much money on a single ingredient.  I decided instead to buy unshelled pistachios and shell them myself.  It added 15 or 20 minutes to my prep time, and my fingertips are sore, but it was totally worth it.

Caramelized Pistachio, Cashew and Almond Tart
Prep time 15 minutes
Cook time 35 minutes
Serves 8-10

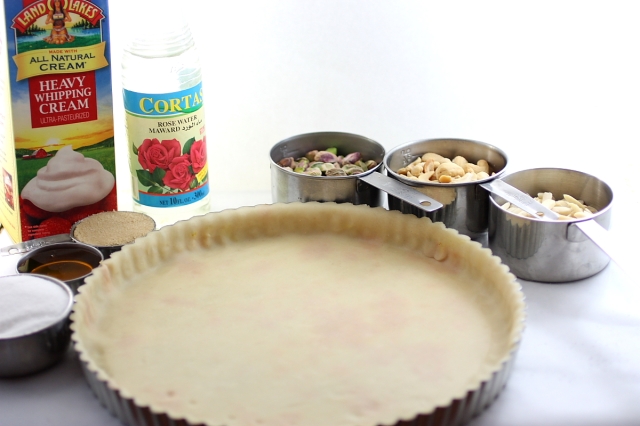
Ingredients
2 store-bought pie crusts
2 teaspoons orange zest
1 cup heavy cream
1/2 cup sugar
1/4 cup brown sugar
1/4 cup honey
3/4 cup toasted pistachios (I use salted)
3/4 cup toasted cashews (I use salted)
3/4 cup toasted slivered almonds (unsalted)
1 1/2 teaspoons rose water

Begin by laying one of the pie-crust rounds on a floured surface.  Sprinkle the orange zest on top, and lay the second pie-crust round on top of the first.  Using a rolling pin, roll the crusts together until you can see the orange zest between showing through.  Place the rolled out crust into a 10-inch tart pan, fitting it against the bottom and sides.  Trim the excess dough, and place the tart shell in the freezer for 20 minutes.

Preheat your oven to 350F.

Place cream, sugar, brown sugar and honey in a heavy-bottomed saucepan.  Bring to a boil, stirring until sugar dissolves.  Continue to boil until mixture darkens and thickens slightly (Bon Appetit originally said for 4 minutes, but it usually takes me closer to 8 or 10 minutes).  Removed from the heat, add the nuts and the rose water.  Pour filling evenly into crust.

Bake tart until filling is caramel brown and bubbling all over.  Transfer to a rack to cool.

Enjoy!